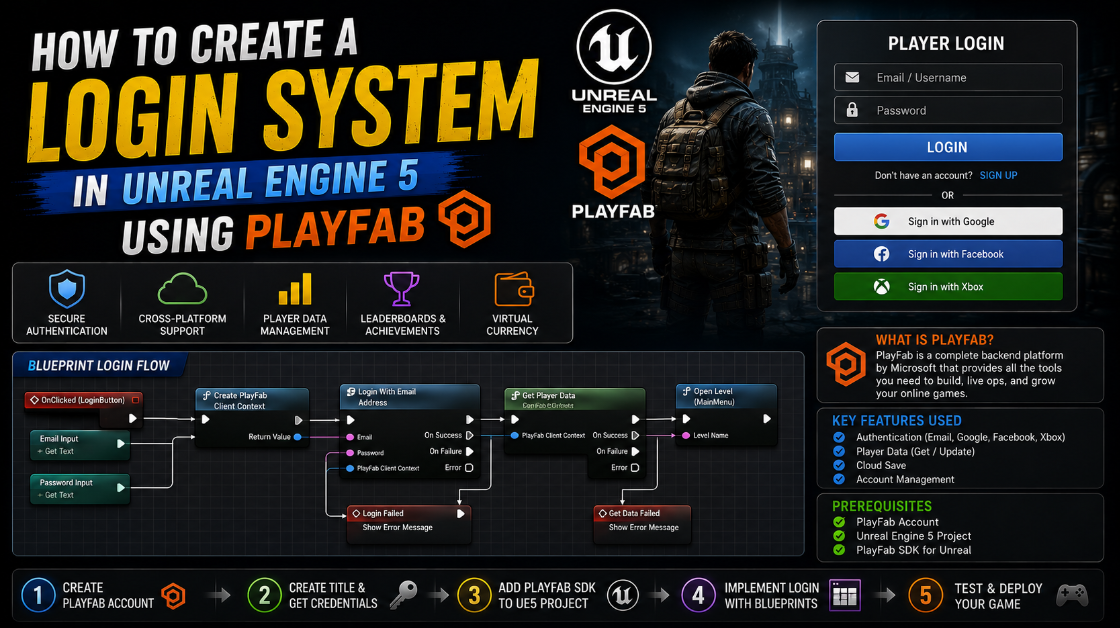
How to Create a Login System in Unreal Engine 5 Using PlayFab
Building your own custom backend server for login and registration works but it takes real time and effort to build and maintain. PlayFab gives you a ready made backend for exactly this. Login registration and account management all handled through a plugin without you needing to run any server infrastructure yourself. In this article I will walk you through building a complete login and register system in UE5 using PlayFab covering the widgets the API calls and how to store the logged in user’s data properly.
By the end of this you will have a working login screen a register screen proper error handling and the player’s authentication data stored somewhere your game can access it for every future API call.
What We Are Building
The end result is a login screen and a register screen both fully connected to PlayFab. A player can create an account with a username email and password. PlayFab validates this on its own end for example rejecting special characters in usernames and if something is invalid the error gets displayed back to the player clearly. Once registered the player can log in and gets taken to a character selection screen. Character creation and selection are worth their own separate article but this one focuses entirely on getting login and registration working correctly.
Step 1: Install and Configure the PlayFab Plugin
Before writing any Blueprint logic make sure the PlayFab plugin is installed in your engine. Go to your plugin browser search for PlayFab and install it if you have not already.
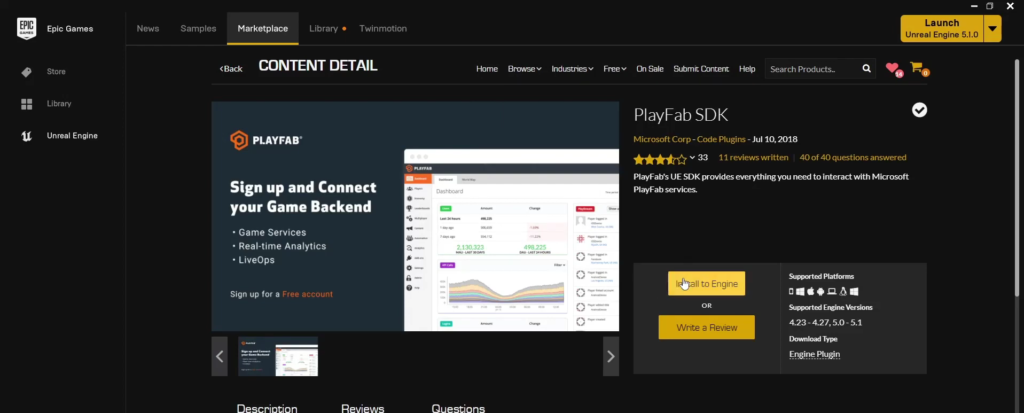
You also need a PlayFab account registered and configured with your project’s title ID connected properly. This setup process involves a few account level steps on PlayFab’s own dashboard rather than inside UE5 itself so make sure this is fully done before moving forward since none of the API calls will work without a properly connected title.
Step 2: Set Up a HUD to Load Your Login Widget
The login and register screens are just widgets and you need some way to actually display them the moment the game starts. The cleanest way to do this is through a HUD Blueprint.
Right click in your Content Drawer go to Blueprint Class and search for HUD. Create this and name it something like AccountsHUD. Inside this HUD Blueprint specify which widget to create and add to the viewport when the game begins. In this case that is your login widget.
Next open or create your Game Mode Blueprint and set its HUD Class to the HUD you just created. Then open your level’s World Settings and set the Game Mode to this same Game Mode Blueprint.
This chain is what connects everything together. Opening the map loads the Game Mode. The Game Mode specifies which HUD to load. The HUD then creates and displays your login widget on begin play.
Step 3: Build the Login Widget Layout
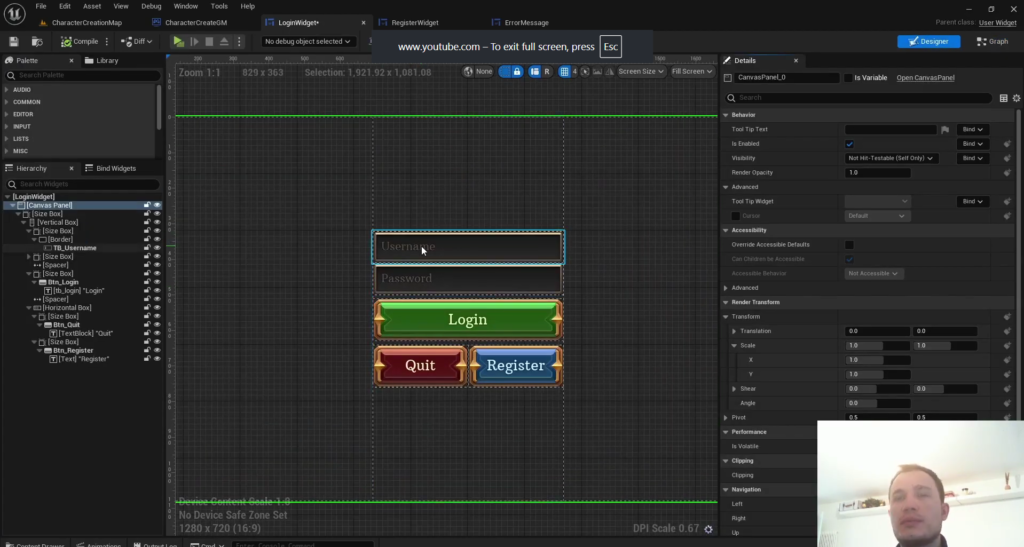
Create a Widget Blueprint for your login screen. The exact visual design is up to you but functionally you need three buttons. Login Quit and Register along with text input fields for username and password.
The Quit and Register buttons are simple. On the Quit button’s On Clicked event just call Quit Game. On the Register button’s On Clicked event create your Register widget add it to the viewport and remove the current login widget from its parent so the player is taken to the registration screen.
The Login button is where the real logic lives.
Step 4: Call the Login API
On your Login button’s On Clicked event you need to call the function to log in with PlayFab. Once the plugin is installed you get access to a large set of new PlayFab functions available directly in Blueprint. The one you want here is Login With PlayFab.
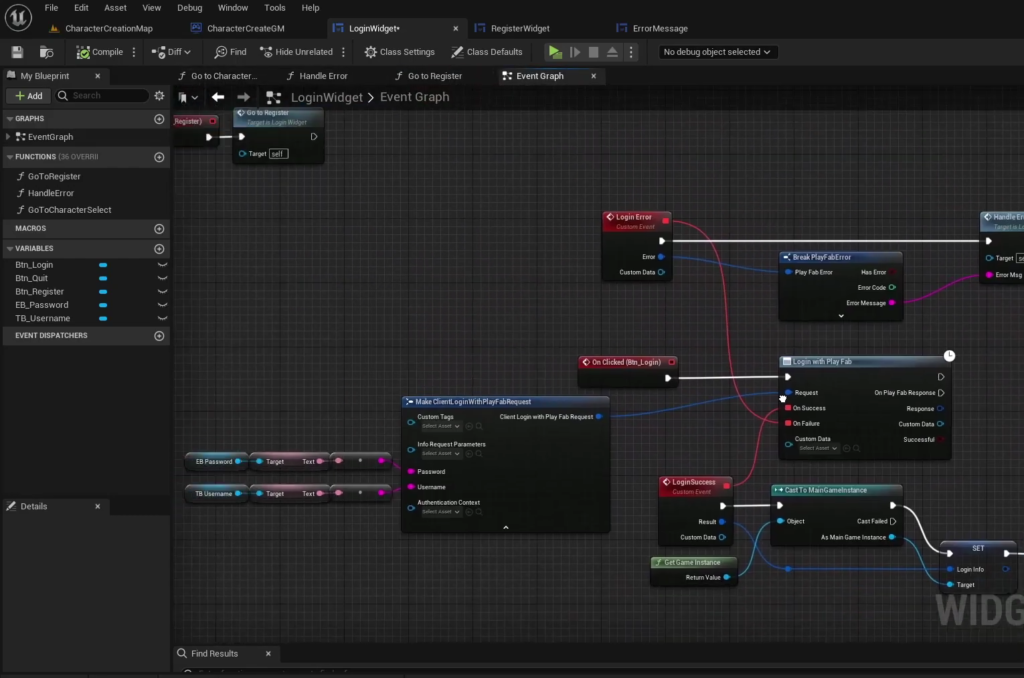
A useful tip when working with PlayFab nodes in Blueprint is that you do not need to already know exactly which request structure a function needs. Find the function you want to execute then drag out from its request input pin and Blueprint will let you make that structure directly from there rather than needing to build it separately beforehand.
For the actual login call populate the username and password fields using the text pulled from your input text boxes on the widget.
This same drag out approach works for the response side as well. Drag out from the event pins and click Add Event to create your success and failure handlers. This automatically pre fills the output data structure for you so you can immediately see what fields are available and break the structure to access whichever ones you need.
Step 5: Handle a Failed Login
Calling Login With PlayFab sends an actual API request to PlayFab’s servers and you get back one of two responses. Either an error or a success.
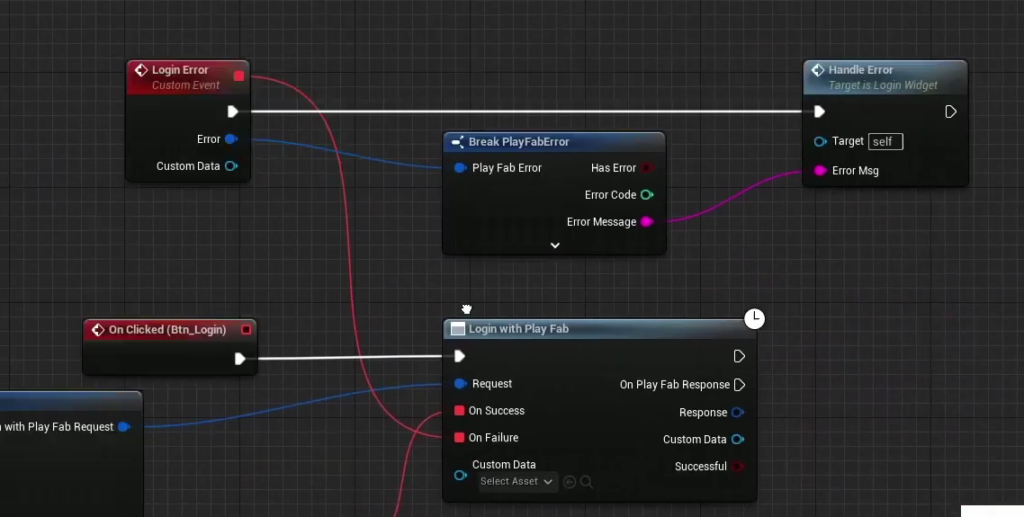
If the login fails you get back a generic error structure containing an error message field. This message is already written in a fairly human readable way by PlayFab itself so you can display it almost directly to the player without needing to translate or reformat it.
Build a separate widget for this called something like ErrorWidget. It just needs an error text field and an OK button. When you instantiate this widget pass in two things through its construction. The parent widget reference so it can be disabled while the error is showing and the actual error message string to display in its text field.
Inside the ErrorWidget on begin play take that parent reference and disable it so the player cannot interact with the background login form while the error message is on top of it. Set the error text field using the message passed in through the constructor.
When the player clicks OK on this error widget re enable the parent widget and remove the error widget from its own parent, returning control back to the login screen.
Back in your login widget’s failure event handler for the login call create this ErrorWidget passing in Self as the parent reference and the error message from the failed login response, then add it to the viewport.
Step 6: Handle a Successful Login
On a successful login the result structure contains all the login information you need. The two most important pieces are the Authentication Context and the PlayFab ID, since these are what you will use to authenticate every future API call you make to PlayFab from this session onward.
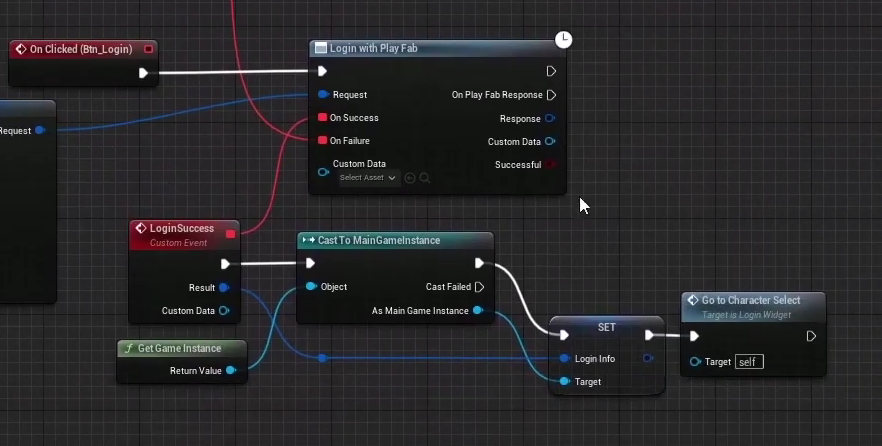
Since you may end up needing more of this login data later for other features it makes sense to store this entire login result somewhere globally accessible rather than only inside the login widget where it would be lost the moment that widget is removed. The right place for this is your Game Instance which effectively acts as a global variable store that persists for the entire duration the game is running.
Step 7: Create and Configure a Game Instance
Right click in your Content Drawer go to Blueprint Class search for Game Instance and select it. Create this and give it a clear name like MainGameInstance.
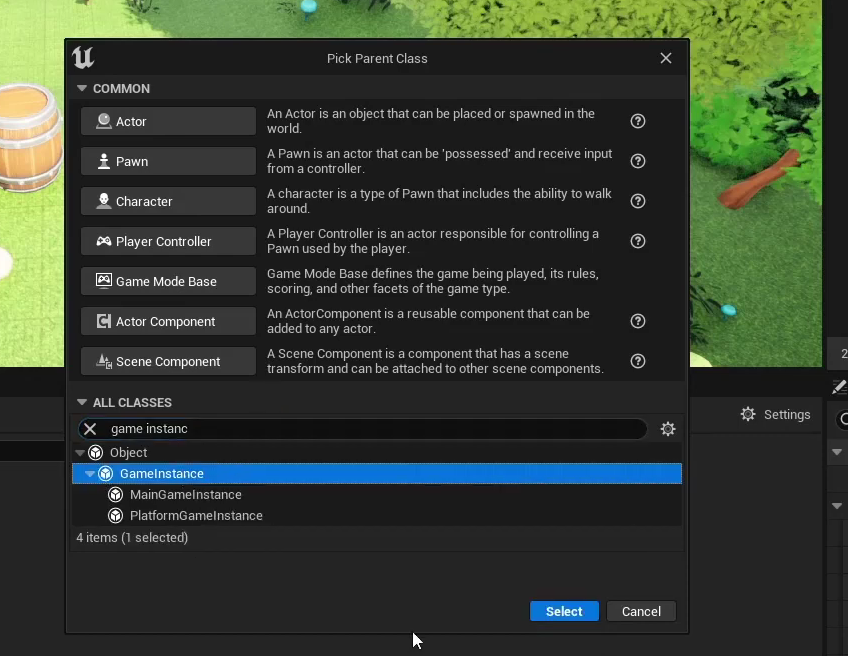
Inside this Game Instance add a variable called something like LoginInfo with its type set to Client Login Result, matching the structure type PlayFab’s login response returns. This is the only setup this Blueprint really needs for now beyond adding this variable.
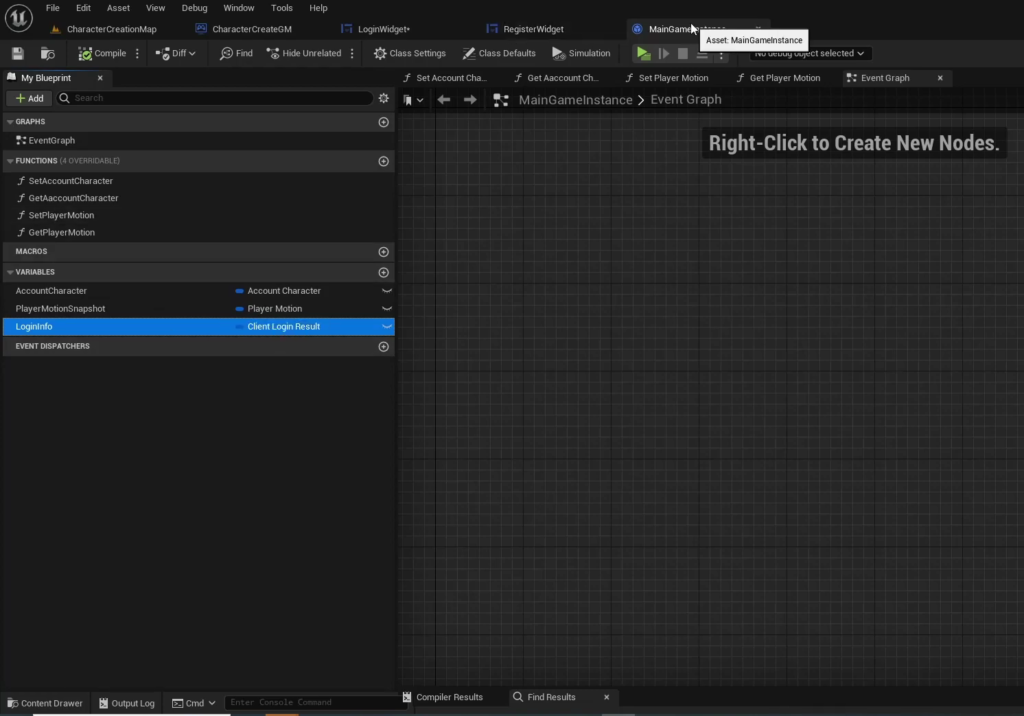
For UE5 to actually use this Game Instance instead of the default one you need to tell your project about it. Go to Edit Project Settings find the Maps and Modes section and locate the Game Instance Class field. Set it to your newly created MainGameInstance.
Step 8: Store the Login Result in the Game Instance
Back in your login widget’s success event handler get the Game Instance using Get Game Instance and cast it to your MainGameInstance class. Set its LoginInfo variable using the full login result you received from the successful PlayFab call.
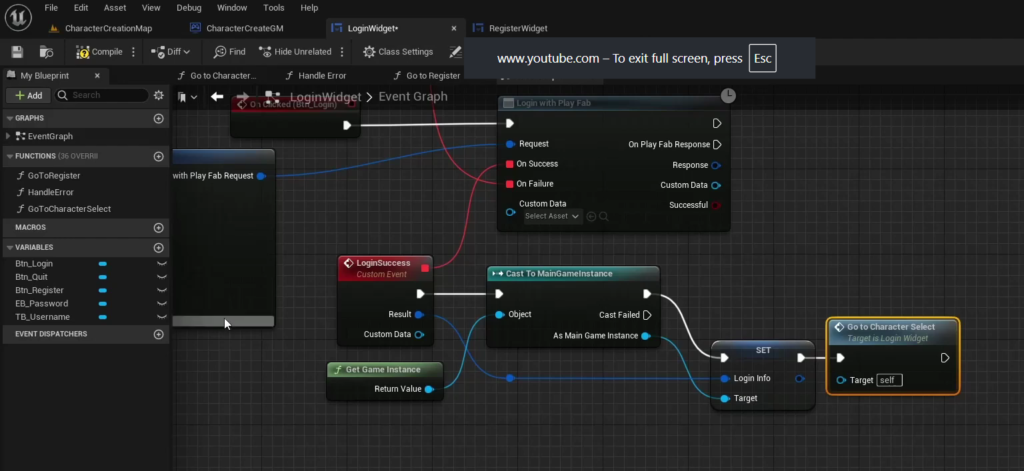
Once this is stored you can navigate the player onward to your character selection screen, since you now have the authentication context and PlayFab ID saved somewhere every other part of your game can reach.
Step 9: Build the Register Widget
Create a separate Widget Blueprint for registration. Like the login screen the exact visual layout is up to you but you need input fields for username email and password along with a Register button and a Back button.
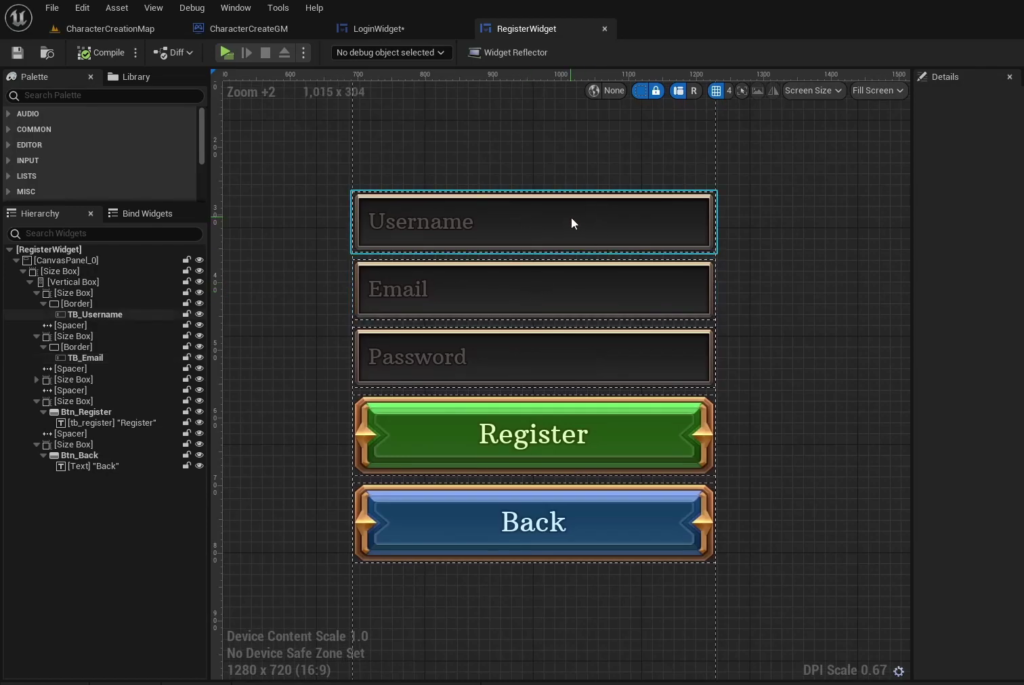
The Back button is straightforward. On its On Clicked event create the login widget add it to the viewport and remove the register widget from its parent, taking the player back to the login screen.
Step 10: Call the Register API
On the Register button’s On Clicked event call the Register With PlayFab User function. Just like the login call you can drag out from the request pin to build the required structure directly.
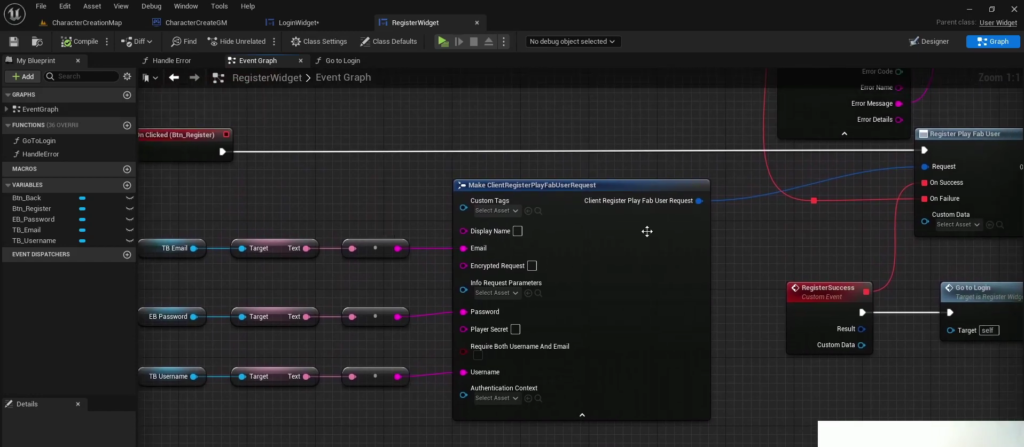
Populate this request with the email password and username fields pulled from your input text boxes. PlayFab’s register function does support additional fields like a display name if you want to collect that as well but for a basic working registration system username email and password is sufficient.
Step 11: Handle Register Success and Failure
The failure handling here works almost identically to login. If registration fails you get back an error structure containing a message you can present directly to the player. This might happen for several reasons such as the email already being taken the username already being taken or the password not meeting minimum length requirements. Present this error the same way you did for login, either reusing your existing ErrorWidget or building similar logic specific to this screen.
On a successful registration you do not need any new logic here. Simply navigate the player back to the login screen using the same logic you already built for the Back button, since a successful registration means they can now log in normally with the credentials they just created.
Step 12: Test the Full Flow
At this point you have a complete loop worth testing end to end. Open the game and confirm the login widget appears automatically through your HUD setup. Try registering a new account and confirm invalid input, such as special characters in the username, correctly shows an error message rather than silently failing or crashing. Fix the input and confirm registration succeeds and returns you to the login screen.
Log in with the account you just created and confirm you are taken to your next screen, whatever that may be in your project such as a character selection screen. If you have that set up you should also be able to confirm that the PlayFab ID and Authentication Context stored in your Game Instance are valid enough to support further API calls, such as creating a character tied to this account.
Final Thoughts
This login and register system gives you the foundation every other PlayFab feature builds on top of. Once you have a valid Authentication Context and PlayFab ID stored in your Game Instance you have everything required to start making authenticated calls for things like character data inventory systems leaderboards and anything else PlayFab offers.
The pattern used throughout this system is worth remembering since it repeats constantly when working with PlayFab in Blueprint. Call the relevant PlayFab function drag out the request pin to build its input structure populate the fields it needs and then handle both the success and failure events separately, presenting failures clearly back to the player rather than letting them fail silently.
If your login or register calls are not returning the response you expect or your error widget is not displaying correctly reach out at Admin@KaliPress.fun and I will help you figure out exactly where the setup needs adjusting.

Solo Indie Game Developer and Unreal Engine (UE4 & UE5) Specialist with over 5 years of experience building optimized Android games from scratch.
I specialize in handling the full development pipeline independently taking mobile titles from concept to high-performance, publishing ready APK/AAB builds. Highly focused on rendering optimization for low-to-mid range devices, Blueprint scripting, and custom mechanics.
Through this blog, I share my practical knowledge and tutorials to help aspiring developers master the Unreal Engine mobile ecosystem.