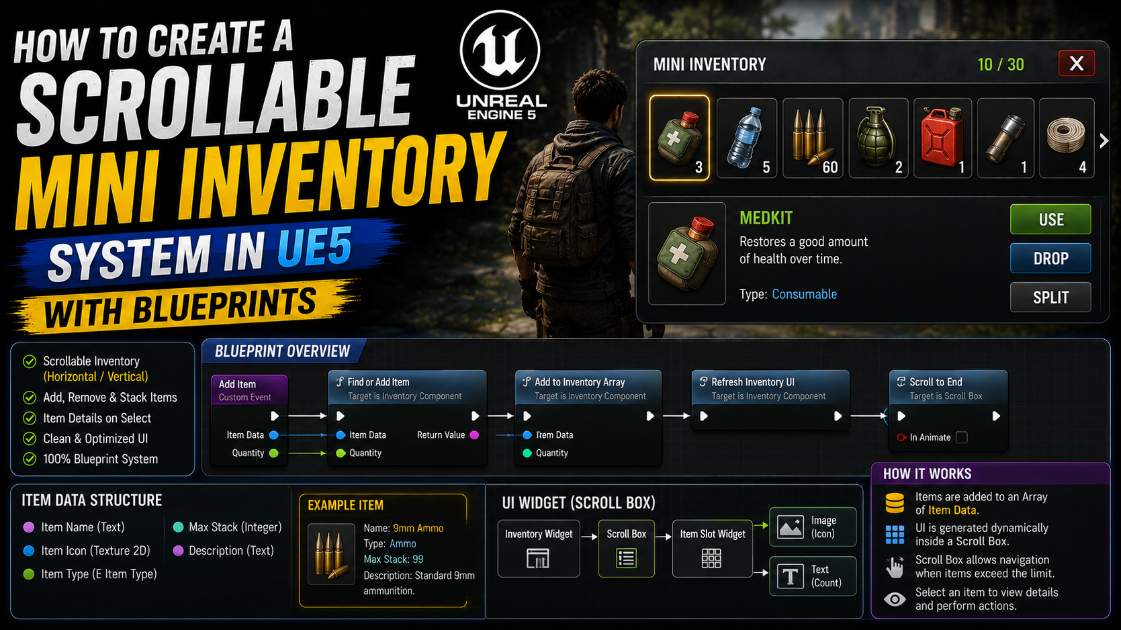
How to Create a Scrollable Mini Inventory System in UE5 with Blueprints
A mini inventory bar at the bottom of the screen is something almost every action or survival game has. A row of slots where the player can hold a few items scroll between them and see what they are currently carrying. It looks simple on screen but building it properly involves connecting your pickup system a widget UI and some array logic together in a clean way.
In this article I will walk you through building exactly this. A five slot inventory bar where the player can scroll up and down to select a slot and picked up items automatically fill the first empty slot they find.
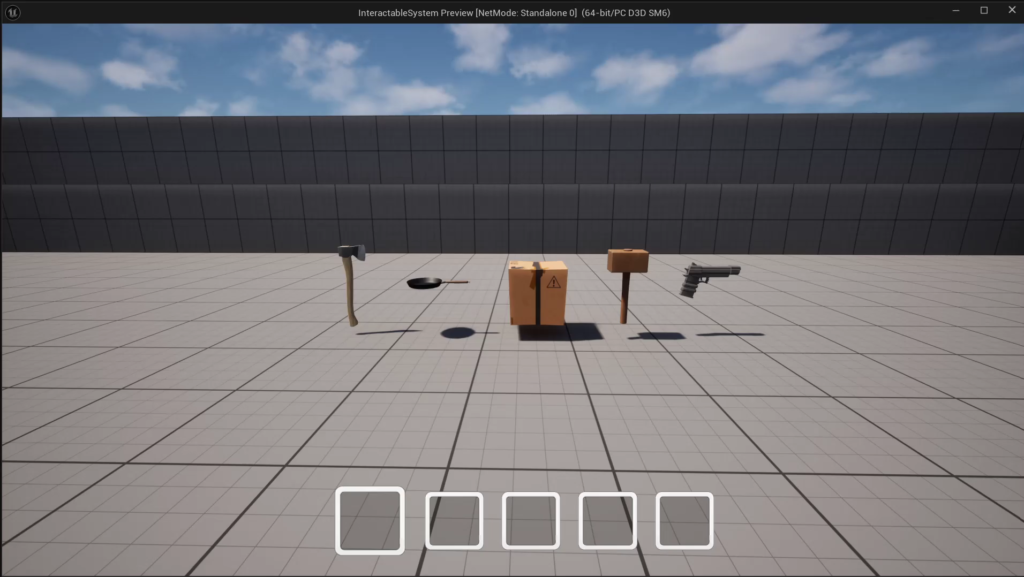
This tutorial assumes you already have a basic item pickup and interaction system in your project where the player presses a key near an item and picks it up. If you do not have that set up yet you will want to build a simple interact and pickup system first since this article focuses specifically on the inventory logic that sits on top of it.
Step 1: Understand the Existing Pickup Setup
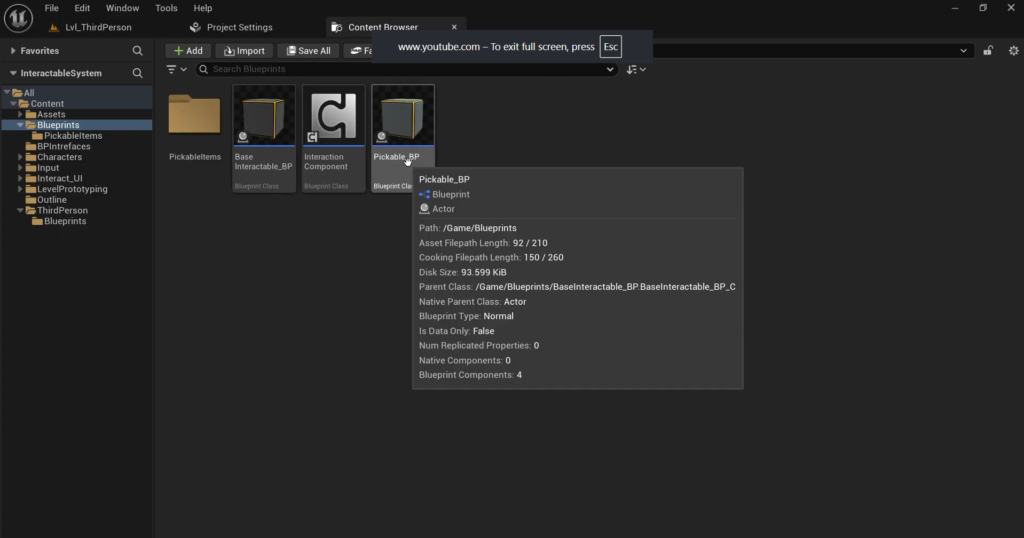
Before changing anything take a look at how a basic pickup system is usually structured. Items in the level share a parent Blueprint class let us call it BaseInteractable_BP which contains an Interact event that fires when the player presses the interact key near it. This event calls a PickupItem event containing the logic for actually picking up the item.
On the Character Blueprint side there is usually an Item Staring Mesh Component attached under the Follow Camera. When the player picks something up this component’s static mesh gets set to the item’s mesh and positioned in front of the camera so it looks like the character is holding it.
Step 2: Move Pickup Logic Into the Character Blueprint Using an Interface
Since the pickup system and the inventory system need to work closely together it makes sense to move the actual pickup logic out of the item Blueprints and into the Character Blueprint instead. To call a function on the Character Blueprint from the item Blueprint without hard referencing a specific class we use a Blueprint Interface.
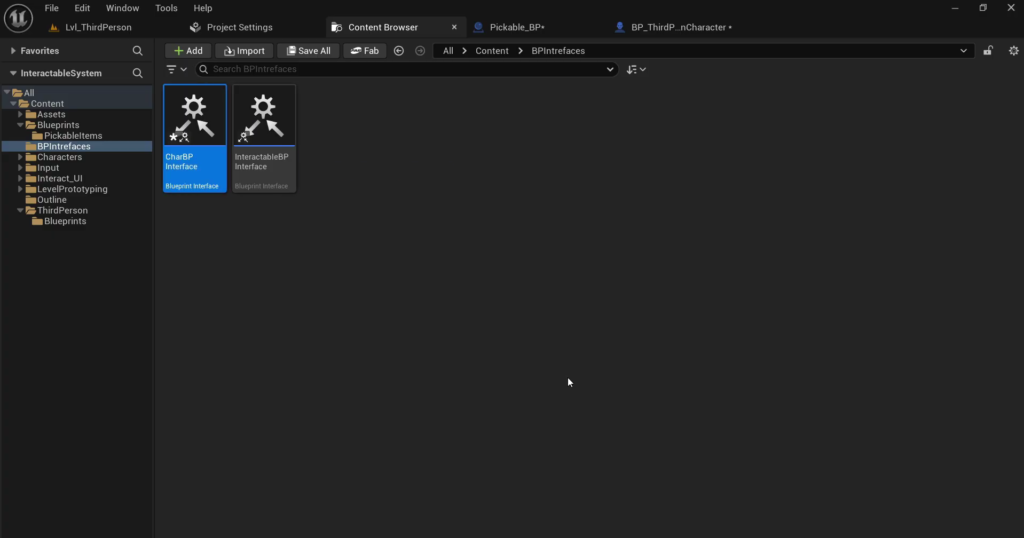
Go to your Content Drawer right click and under Blueprints select Blueprint Interface. Name it CharacterBlueprintInterface.
Open it and add a new function called PickupItem. Give it two input parameters. The first is Item Mesh with the variable type set to Static Mesh. The second is Item Transform with the variable type set to Transform which stores the item’s orientation in front of the camera. Add one output parameter as well a Boolean which will tell the calling item whether the pickup actually succeeded or not.
Step 3: Add the Interface to Your Character Blueprint
Open your Character Blueprint go to Class Settings and under Interfaces add CharacterBlueprintInterface. Once added you will find the PickupItem function listed under an Interfaces category in your Character Blueprint’s function list ready for you to implement its logic just like any normal function.
Step 4: Call PickupItem From the Interact Event
Go back to your item’s Interact event where it previously called its own pickup logic. Instead search for the PickupItem function. Since this comes from the interface you will find it without needing a hard reference.
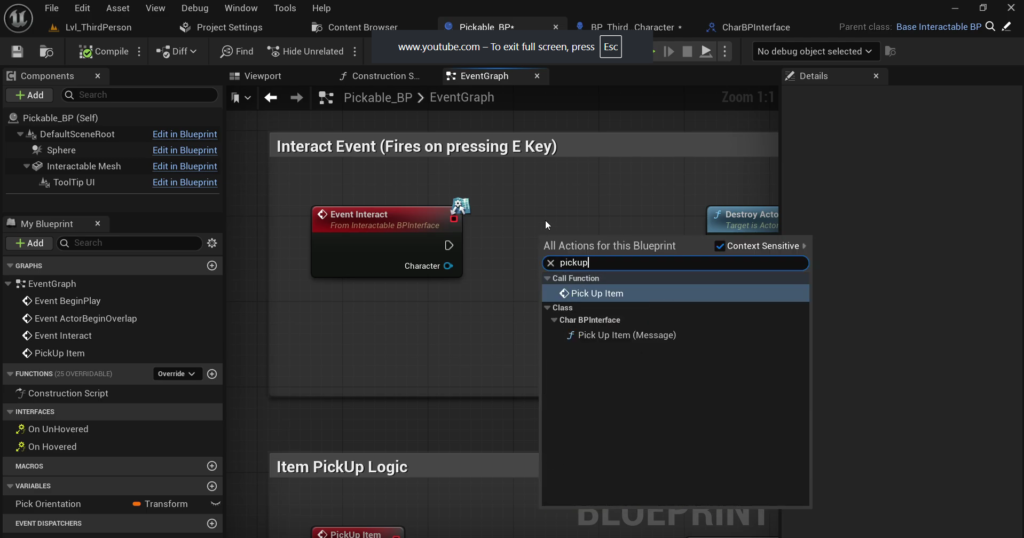
For the Target input you can plug in any valid reference to the character since the engine already knows this function exists on it through the interface meaning you do not even need to cast to your character class.
For the Item Mesh input get the static mesh off the interactable actor itself. For the Item Transform input use whatever variable you already have storing the item’s pickup orientation. After the call check the returned Boolean and if it is true destroy the item from the level since a successful pickup means it should no longer exist there.
Step 5: Implement the Pickup Logic Inside the Character Blueprint
Now implement the actual PickupItem event inside your Character Blueprint. Copy over the pickup logic that used to live in the item Blueprint and paste it here. This logic should set the Item Staring Mesh Component’s static mesh to the Item Mesh input and position it using the Item Transform input.
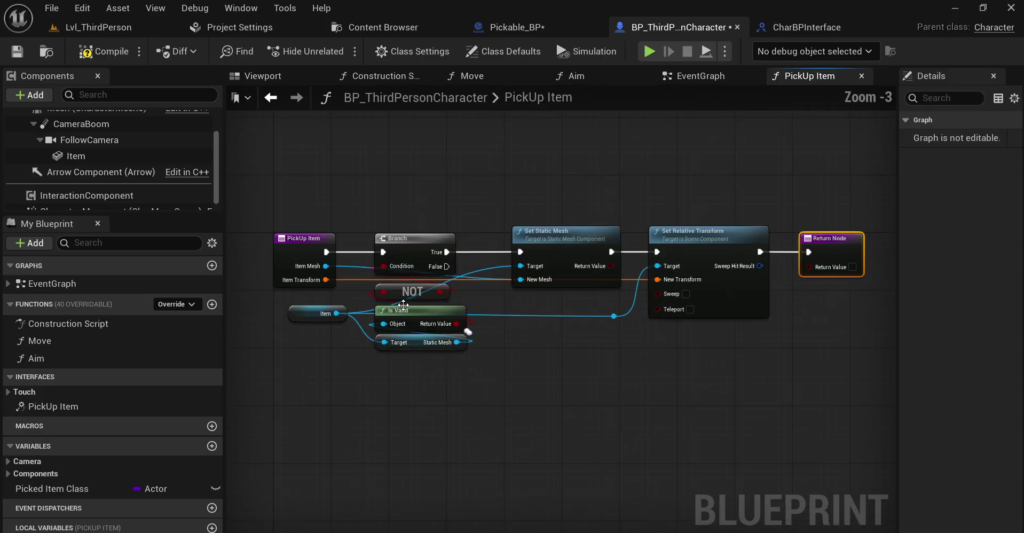
Add a check here as well. If the item component already has a static mesh set it means the character is already holding something so return false from this function. If it is empty go ahead and set the mesh position it and return true.
Test this at this point by walking up to an item and pressing interact. If everything is wired correctly the item should disappear from the level and appear attached to the camera.
Step 6: Build the Inventory Widget
Right click in the Content Drawer go to User Interface and create a Widget Blueprint. Name it HUD_UI since this will stay on screen throughout gameplay.
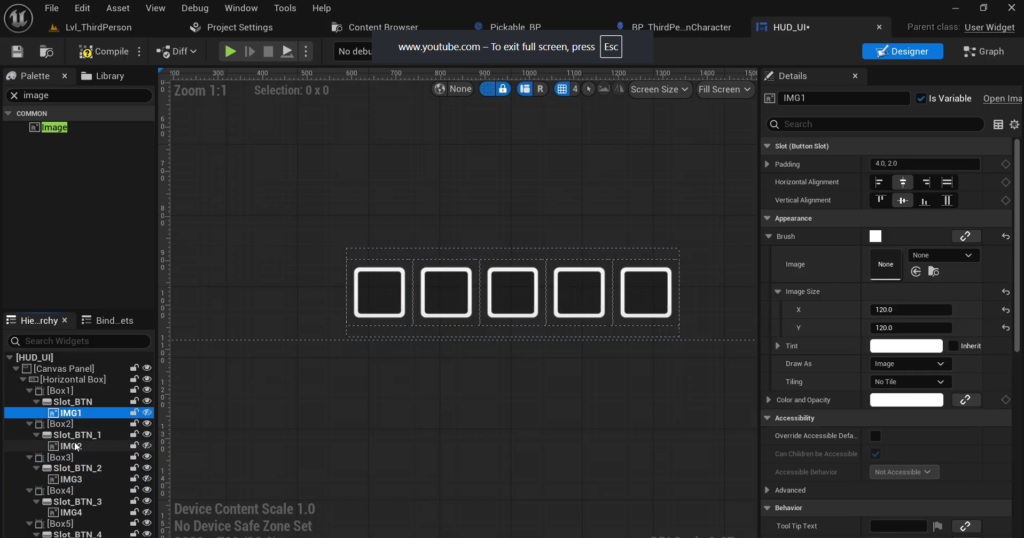
Open it and add a Canvas Panel as the base. Since the slots need to sit in a row at the bottom of the screen add a Horizontal Box inside it. If each slot is going to be 150 pixels wide and you want five of them set the box’s width to 150 multiplied by 5 and give the height more space than you think you need. Set the anchor to the bottom of the screen.
Step 7: Build a Single Slot
For each slot add a Size Box inside the Horizontal Box. Set its size mode to auto and align it to the center. Check the Width Override and Height Override options and set both to 150 or whatever your slot image size actually is.
Inside the Size Box add a Button and give it an image using your slot background image. Set the image size to match 150 in this case choose Draw As Image and set the tint to white so the image renders at full brightness rather than tinted.
Inside the button add an Image element for the item icon that will appear once something is placed in this slot. Size this a bit smaller than the slot itself around 120 since the icon should sit comfortably inside the slot border. Set this image’s Visibility to Hidden by default since it should only appear once an item actually occupies that slot.
Step 8: Duplicate the Slot and Set Up Variables
Rename all your elements clearly then duplicate the entire Size Box four more times so you have five slots total and rename each one in order such as SizeBox_0 through SizeBox_4 and Image_0 through Image_4.
Select every image element and every size box element and check the Is Variable box for each one. This exposes them in the Graph tab so your Blueprint logic can reference and modify them individually later.
Step 9: Add the Widget to the Player’s Screen
Go to your Character Blueprint’s Event BeginPlay. Add a Create Widget node select HUD_UI as the class promote the result to a variable so you can reference it later and call Add to Viewport.
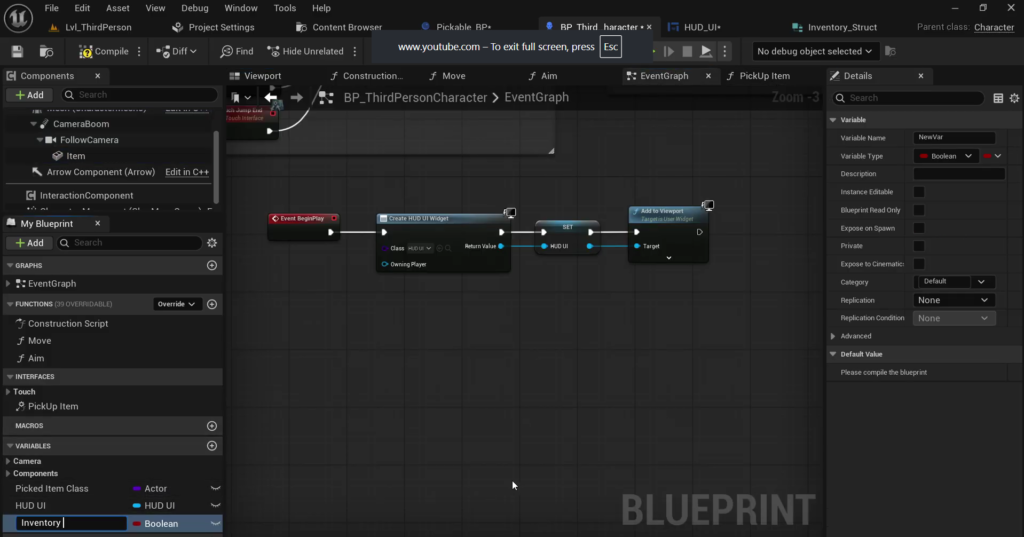
Play the game and you should now see your five empty slots sitting at the bottom of the screen.
Step 10: Create the Inventory Data Structure
To store all the information about a picked up item in one place right click in the Content Drawer and create a new Structure. Name it InventoryStruct.
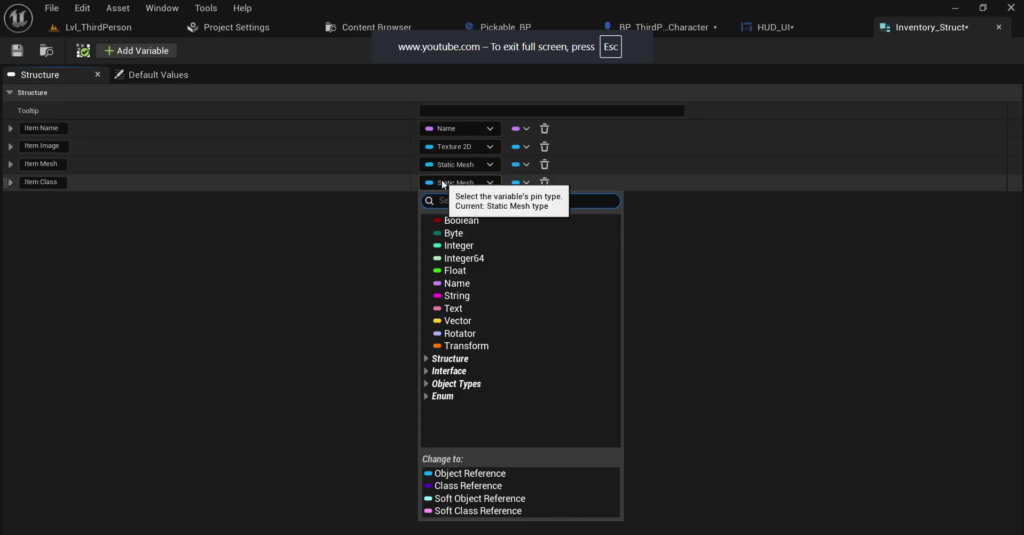
Add the following variables to it. Item Name as a Name type. Item Image as a Texture2D used for the icon shown in the slot. Item Mesh as a Static Mesh storing the item’s actual mesh. Item Class as a Class Reference set to your base interactable Blueprint class since that is the parent of all your pickable items. Item Orientation as a Transform storing where the item sits in front of the camera once picked up.
Step 11: Add Item Data to Your Pickup Blueprint
Go to your item pickup parent Blueprint the same base class all your pickable items inherit from. Add a variable called Item Data with the type set to your new InventoryStruct.
Now every item that inherits from this parent will have access to this data. In each specific item’s child Blueprint set the Item Name and Item Image manually since these are unique to that specific item and cannot be calculated automatically.
Step 12: Fill the Rest of the Data Automatically
Go back to the parent pickup Blueprint and open its Construction Script since this runs even outside of Play mode and is the right place to auto fill data that depends on the Blueprint’s own components. Get the Item Data struct break it then use a Make InventoryStruct node to set its values.
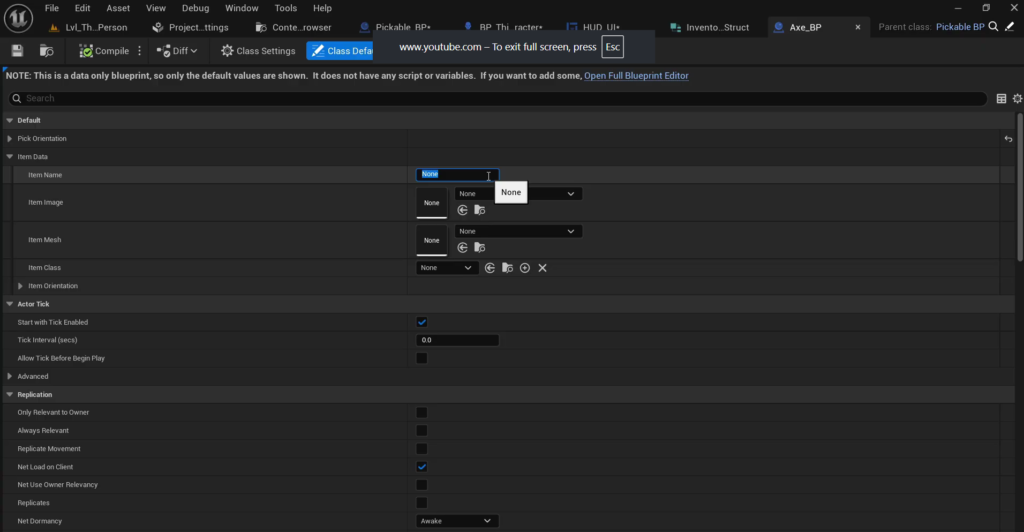
For Item Name and Item Image just get the current Item Data values and pass them straight through unchanged since these were already set manually. For Item Mesh get your item’s mesh component and pull its Static Mesh.
For Item Class use a Self reference and get its class. For Item Orientation plug in whatever variable already stores this item’s pickup position. This fills out every item’s full data set automatically without needing to type it in by hand for each one.
Step 13: Store Picked Up Items in an Array
Back in your Character Blueprint add a variable called Inventory Data set its type to InventoryStruct and convert it to an array. Set this array to have five elements one for each slot.
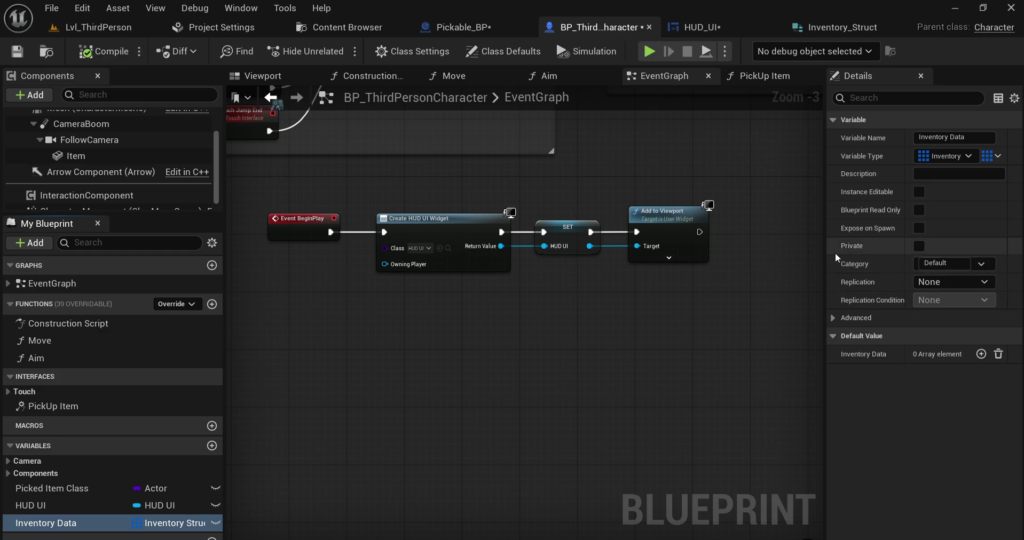
Get this array’s length promote the result to a variable and name it Total Slots. This stores how many slots exist in total five in this case and gives your later logic something to compare against rather than a hardcoded number.
Step 14: Build the Slot Selection Logic
Add a variable called Selected Slot Index set its type to Integer. This tracks which slot is currently highlighted as selected starting at the first slot by default.
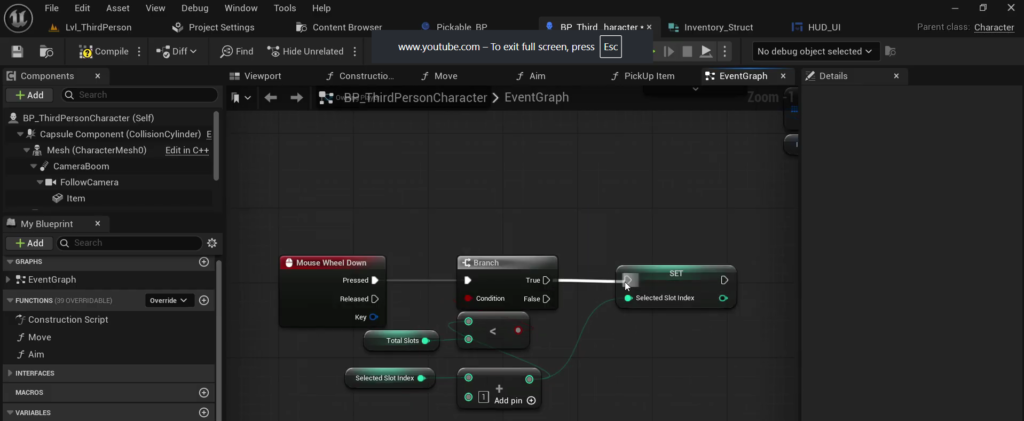
Bind an input event to Mouse Wheel Down. Each scroll down should increase the index by one but only if doing so would not push it past the last available slot. Get Selected Slot Index add one to it and before actually setting this new value check if it is less than Total Slots. Only if that check passes should you update the index.
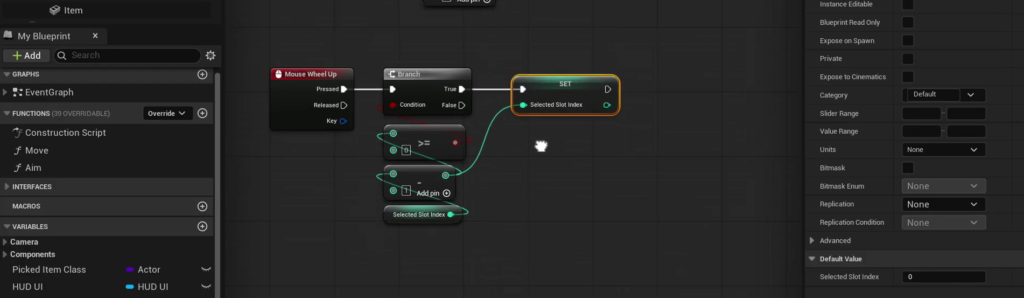
Bind Mouse Wheel Up the same way but in reverse. Subtract one from the current index and only apply the change if the result is greater than or equal to zero. This keeps the index safely within the bounds of your five slots in both directions.
Step 15: Resize the Selected Slot Visually
To make the currently selected slot visually stand out we want it to grow slightly larger than the others. Go to the Graph tab of your HUD_UI widget and create a custom event called UpdateSlotSize. Give it two input parameters. Slot Index as an Integer telling the function which slot to resize and Size as a Float telling it what scale multiplier to apply.
Get all five of your Size Box variables and combine them into an array using a Make Array node keeping them in the same order as your slots. Use a Get (a copy) node on this array with Slot Index as the index which gives you the exact size box that needs resizing.
Do the same thing with your five item icon Image variables building a second array and pulling the matching one using the same index.
Step 16: Calculate and Apply the New Size
Before you can scale anything you need a baseline to scale from. On Event Construct in the widget get any one of your size boxes since they all start at the same default size and pull its Width Override and Height Override values. Promote each to a variable naming them something like Default Box Width and Default Box Height.
Back in UpdateSlotSize multiply these default values by the incoming Size parameter and use the result to call Set Width Override and Set Height Override on the size box you retrieved earlier.
For the item icon image do the same thing but with Set Desired Size Override. Get the image’s current Brush break it to access its Image Size convert your Size float parameter into a Vector2D so it can multiply against both X and Y then multiply this against the original image size to get the new desired size.
Step 17: Trigger the Resize at the Right Moments
Go back to your Character Blueprint’s Event BeginPlay right after adding the widget to the viewport. Call UpdateSlotSize on your HUD_UI reference passing in Selected Slot Index and a size value like 1.2 so the first slot appears slightly enlarged the moment the game starts.
Then in your Mouse Wheel Down and Mouse Wheel Up logic before you actually change Selected Slot Index call UpdateSlotSize on the currently selected slot with a size of 1.0 to shrink it back to normal. After updating the index to its new value call UpdateSlotSize again on the new index with 1.2 to grow it. This way exactly one slot is enlarged at any given time and it always matches whichever slot the player has scrolled to.
Step 18: Fix the Button Hover State
By default UE5 buttons often change their appearance slightly when hovered or pressed which looks odd for something styled as an inventory slot rather than a normal clickable button. Select each button in your widget copy the image and styling properties from its Normal state and paste the same values into its Hovered and Pressed states. Do this for all five buttons so the slot visuals stay consistent no matter what the player’s cursor is doing.
Testing What You Have So Far
At this point scrolling your mouse wheel should smoothly move the enlarged highlight between all five slots without ever going out of bounds in either direction and your pickup system should still be working correctly through the interface call you set up earlier. This covers the foundation of the system moving pickup logic into the character building the slot UI and getting slot selection and resizing working correctly.
Actually placing picked up items into their icons inside these slots along with removing them when the player drops an item builds directly on top of everything set up here and is a natural next step once this foundation is solid and tested.
If your slots are not resizing correctly or your scroll input is not staying within the five slot range reach out at Admin@KaliPress.fun and I will help you figure out where the logic needs adjusting.

Solo Indie Game Developer and Unreal Engine (UE4 & UE5) Specialist with over 5 years of experience building optimized Android games from scratch.
I specialize in handling the full development pipeline independently taking mobile titles from concept to high-performance, publishing ready APK/AAB builds. Highly focused on rendering optimization for low-to-mid range devices, Blueprint scripting, and custom mechanics.
Through this blog, I share my practical knowledge and tutorials to help aspiring developers master the Unreal Engine mobile ecosystem.