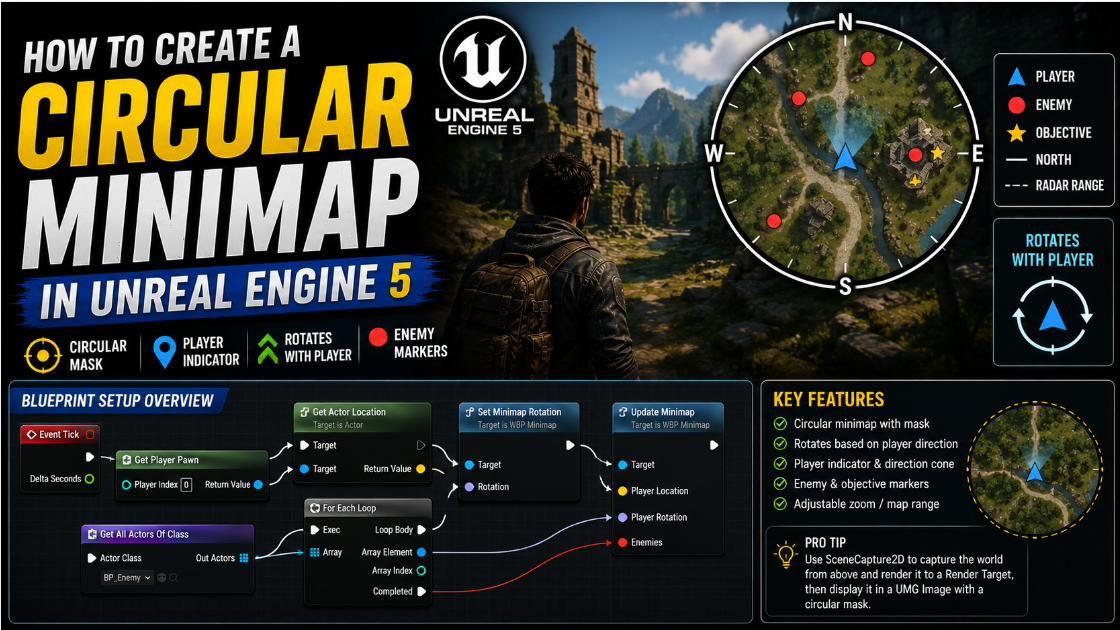
How to Create a Circular Minimap in Unreal Engine 5
A minimap is that small map in the corner of the screen that shows you where you are in the game world. Almost every game has one. It helps players know where enemies are where they are standing and which direction they are facing without needing to stop and look at a full map screen. Building one in UE5 sounds complicated but it is actually a short and simple process once you understand the pieces involved. In this article I will explain step by step how to build a clean minimap using a special kind of camera and a widget to display it on screen.
Step 1: Add a Spring Arm for the Minimap Camera
Open your Third Person Character Blueprint and go to the Viewport tab. We need to add a new component to the character called a Spring Arm. Think of a Spring Arm like an invisible stick attached to your character. A camera sits at the end of this stick and the stick can be rotated to point the camera in any direction you want.
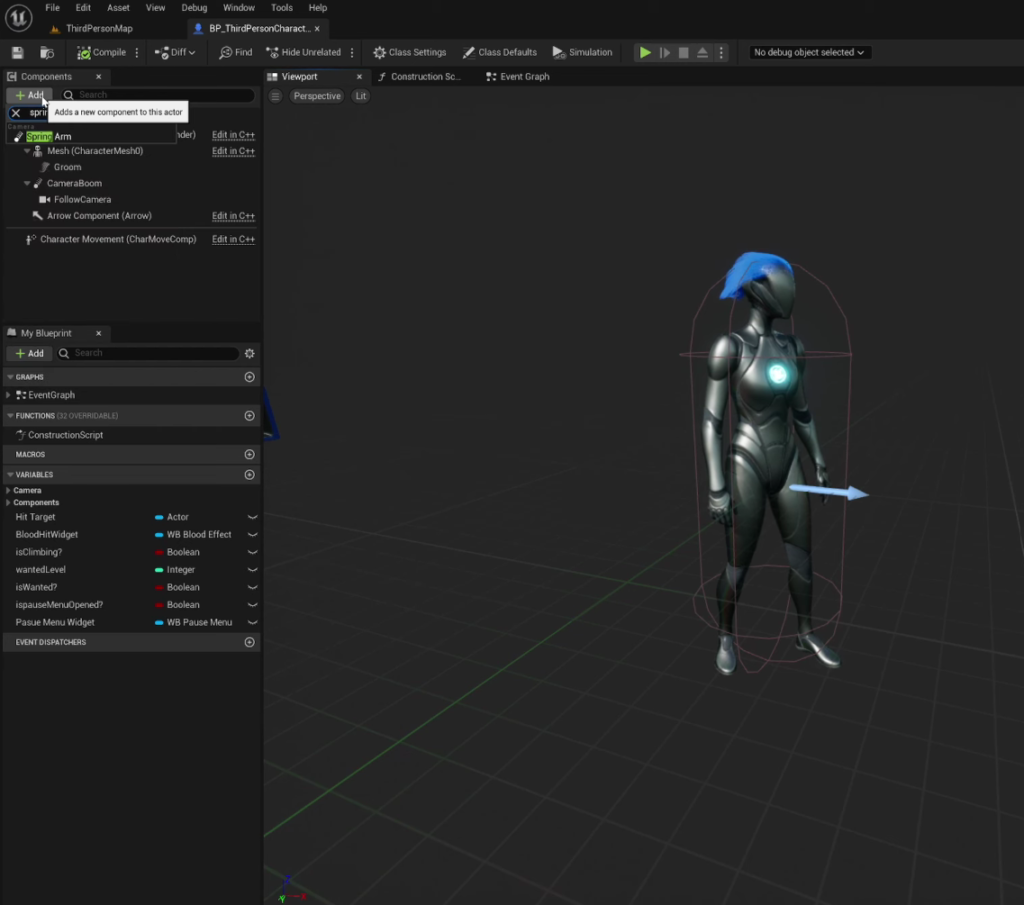
Add this component and name it something like Minimap Spring Arm.
Rotate this Spring Arm by 90 degrees so instead of pointing forward like a normal camera it now points straight down toward the top of the player’s head. Then increase its Target Arm Length a little bit maybe around 450. This controls how far away the camera sits from the character which is basically how zoomed in or out your minimap will look.
Step 2: Add a Scene Capture Component
Now add another component as a child of this Spring Arm. This one is called Scene Capture Component 2D. This is not a normal camera that the player looks through.
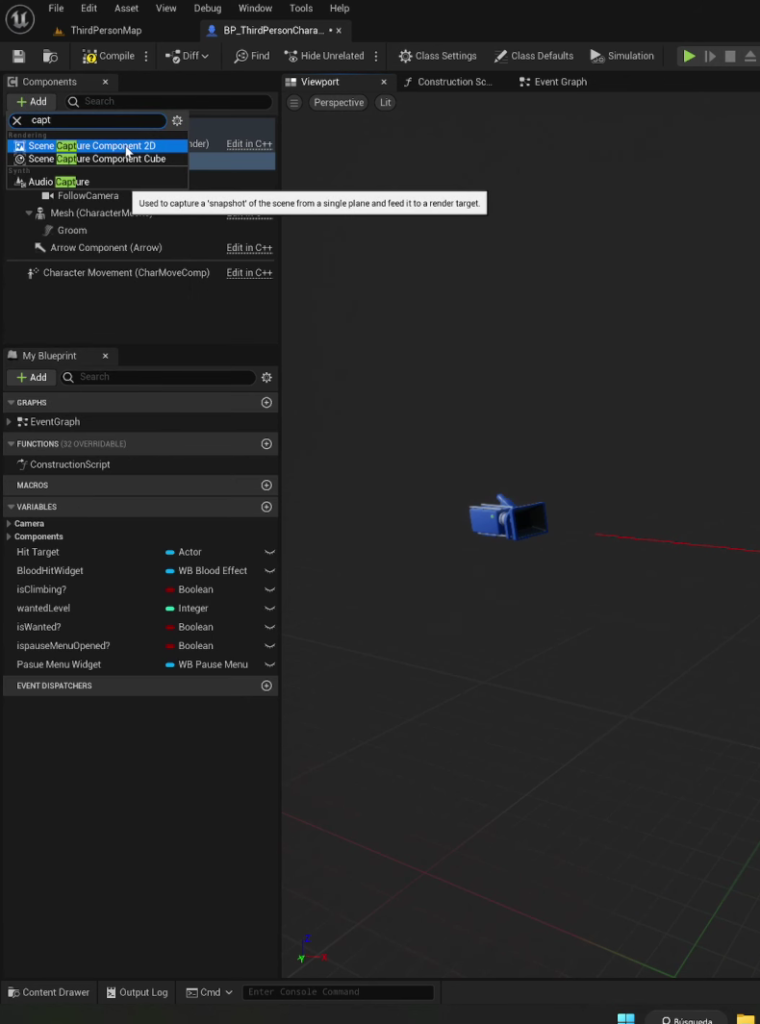
Instead this special camera captures whatever it sees and saves it as an image that we can use anywhere we want including inside a UI widget.
Think of it like a security camera that is always filming and sending its video feed somewhere else instead of showing it directly on a TV screen in front of you.
Step 3: Create a Render Target
Scroll down in this component’s settings until you find something called Texture Target. This is where we tell the camera where to actually save what it sees.
Right click in your Content Drawer and create a new Render Target. A Render Target is basically like a blank canvas that this camera can paint onto in real time. Name it something like RT Minimap.
Assign this Render Target to the Texture Target field on your Scene Capture Component. If you open this Render Target now you should already see a live top down view of your character and the world around them. This confirms the camera is working correctly.
Step 4: Turn the Render Target Into a Material
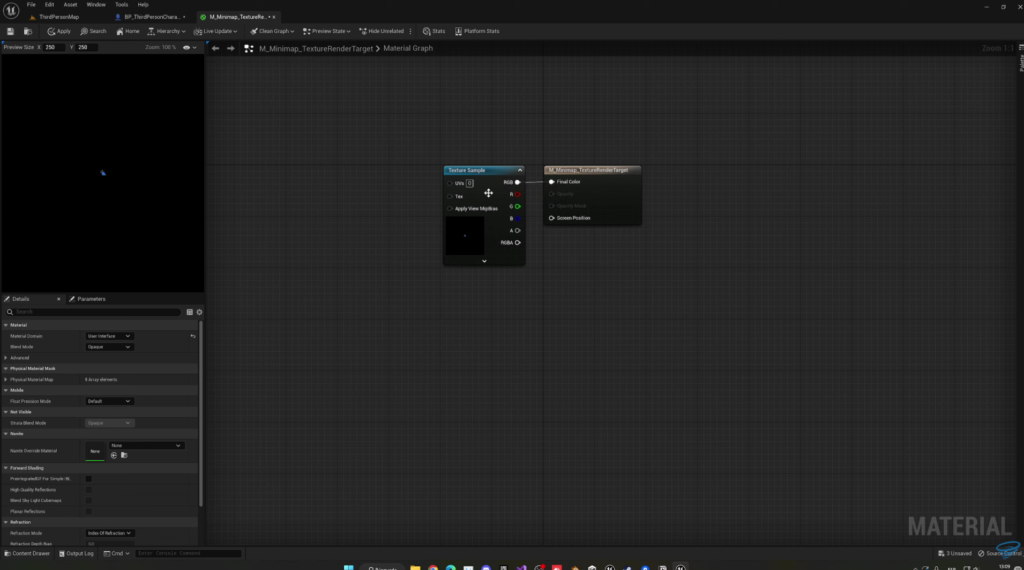
A Render Target by itself cannot be placed directly into a UI widget. We first need to turn it into a Material so our UI system knows how to display it properly.
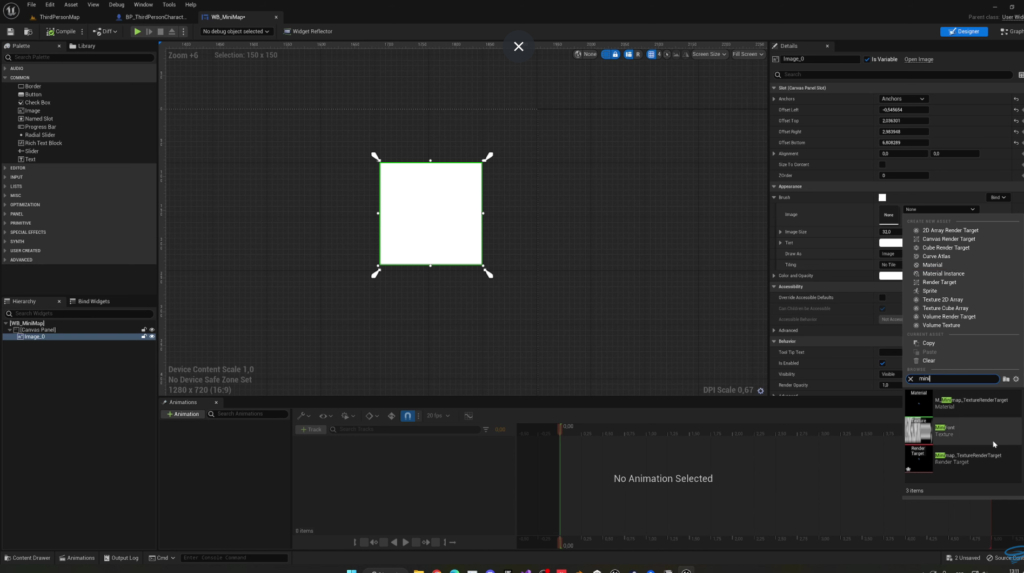
Right click on your Render Target and choose Create Material. Name this new material something like M Minimap.
Open this material and select the main output node. Change its Material Domain to User Interface since we are going to use this specifically inside a widget rather than on a 3D object in the world. Then connect the RGB output from your Render Target texture node into the Final Color input of the material.
Save and compile everything. At this point you have successfully turned your live top down camera feed into something your UI system can actually display.
Step 5: Build the Minimap Widget
Right click in your Content Drawer go to User Interface and create a Widget Blueprint. Name it something like WB Minimap.
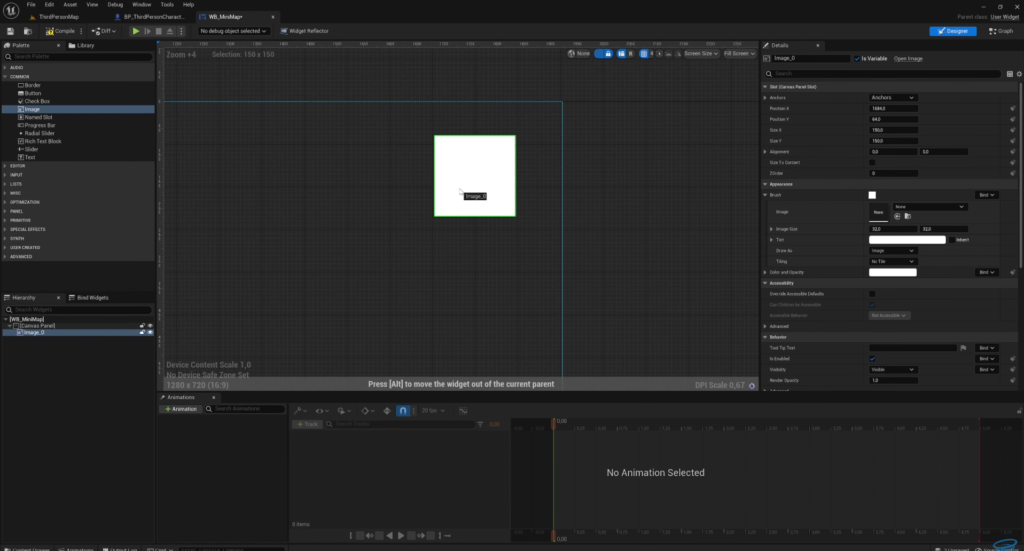
Open this widget and add a Canvas Panel to the hierarchy first since this is what lets us freely place elements anywhere on the screen.
Now add an Image element and drag it into whichever corner of the screen you want your minimap to appear. A common spot is the top right corner since many games place notifications and other messages elsewhere on the screen leaving this corner free.
Set the size of this image to something like 150 by 150 so it forms a nice even square. Then use the anchor settings to lock it to that same corner. Anchoring makes sure your minimap stays in the correct position even if the player changes their screen resolution or aspect ratio later.
Finally go to the Brush section of this Image element and set its image to the M Minimap material you created earlier. Compile and save.
Step 6: Show the Widget When the Game Starts
Go back to your Third Person Character Blueprint and open the Event Graph. Find Event BeginPlay or create one if you do not already have it.
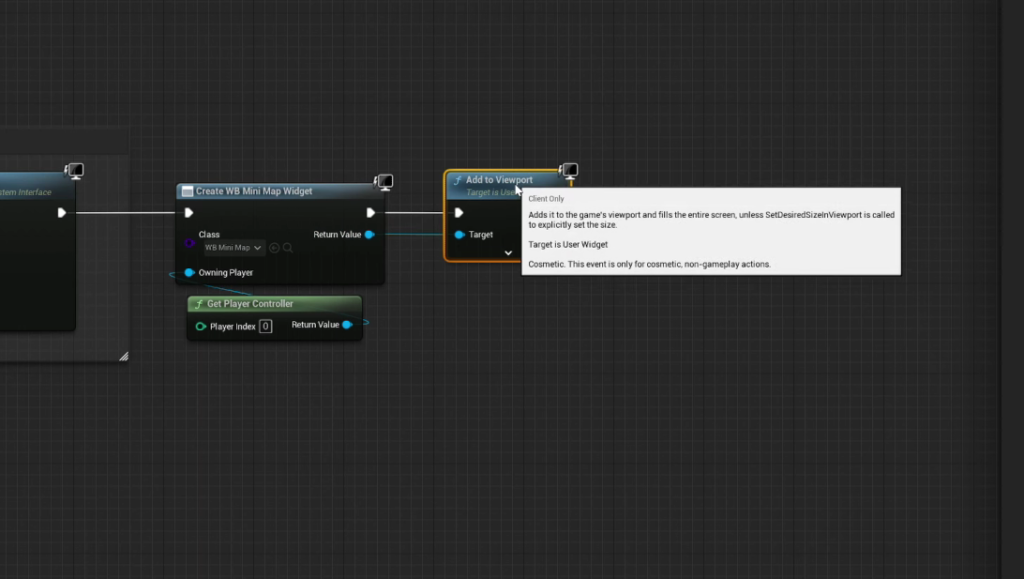
Add a Create Widget node and set its class to WB Minimap. Set the Owning Player to Get Player Controller.
Take the returned value from Create Widget and connect it to Add to Viewport. This actually places the widget onto the player’s screen.
Press play now and you should already see a small minimap appear in the corner showing a live top down view that updates as you move around. This is a great starting point but there are a few things that will look a little rough right now which we will fix next.
Step 7: Stop the Camera From Rotating With the Player
Right now if you look closely you will notice the camera itself rotates whenever your character turns. This makes the minimap spin around constantly which looks messy and is hard to read. Most games keep the minimap facing one fixed direction while only the little player icon rotates to show which way you are facing.
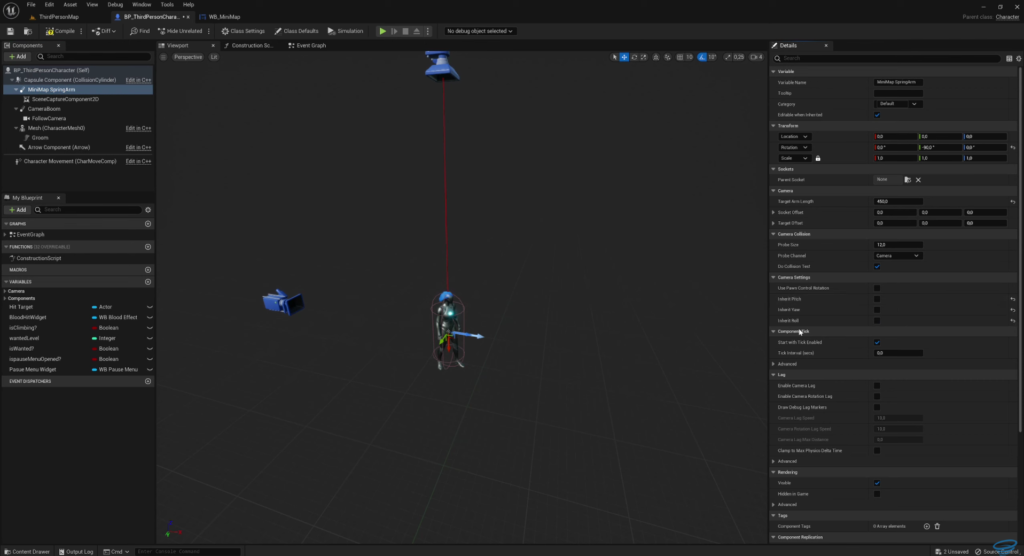
To fix this go to your Spring Arm component and find the Camera Settings. Disable all the Inherit options here such as Inherit Pitch Inherit Yaw and Inherit Roll. This tells the Spring Arm to ignore the character’s rotation completely and always stay pointed in the same fixed direction no matter which way the player turns.
Step 8: Switch to Orthographic Projection
Right now the minimap camera uses something called Perspective projection which is the same kind of view a normal game camera uses. This creates a sense of depth where things further away look smaller which is great for regular gameplay but looks strange and distorted for a flat top down minimap.
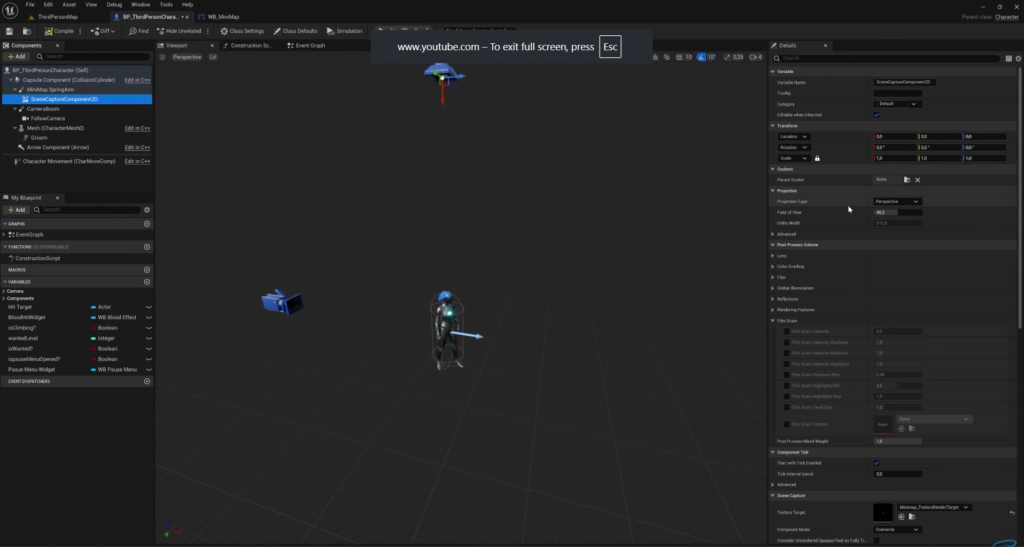
Go to your Scene Capture Component and change its Projection Type from Perspective to Orthographic. This removes all that depth and distortion giving you a perfectly flat clean top down view which is exactly what a good minimap should look like.
Once you switch to Orthographic mode you will notice the Spring Arm’s length no longer really affects how zoomed in the camera is. Instead you need to adjust a setting called Width on the Scene Capture Component itself. Increasing this value zooms the camera out so you can see a bigger area around your character. Play with this number until the zoom level feels right for your game.
Step 9: Add a Player Direction Indicator
A minimap without any marker showing where the player actually is and which way they are facing is not very useful. We are going to add a small arrow icon that always represents the player’s position and direction on the minimap.
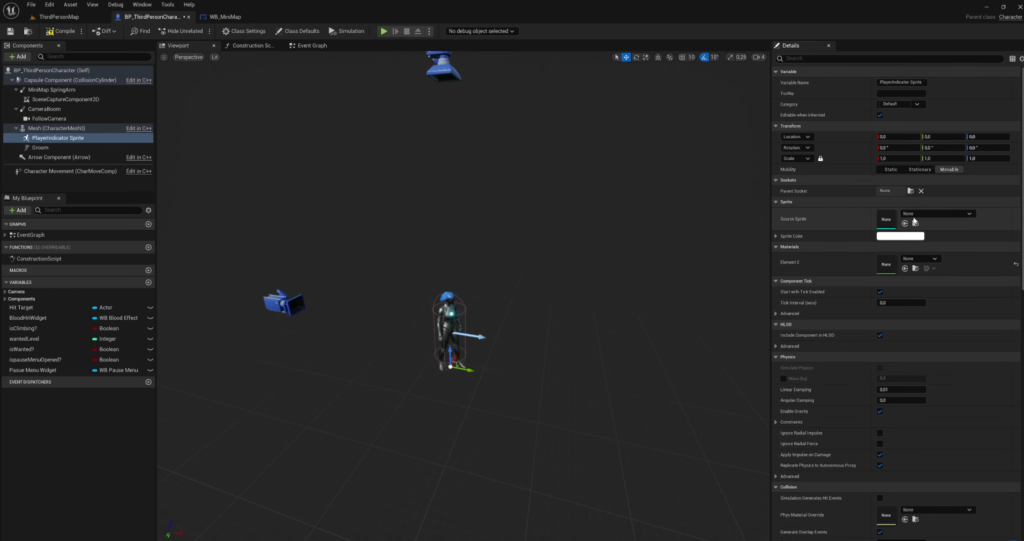
Go back to your Third Person Character Blueprint and inside the Mesh component add a new child component called a Paper Sprite. Name it something like Player Indicator Sprite.
You need an arrow image for this. Once you have one select it in your Content Drawer right click and choose Create Sprite under Sprite Actions. This converts your plain image into a format the Sprite component can actually use.
Assign this newly created sprite to your Player Indicator Sprite component. You will likely need to rotate it by about 90 degrees and shrink its size down quite a bit since sprite scale interacts differently with the orthographic camera compared to a normal perspective view. Position it slightly above the character’s head and slightly below the minimap camera itself so it sits clearly in view without clipping through anything.
Step 10: Fix the Indicator Showing Up in the Normal Game View
Once you press play you will notice the arrow indicator is now visible on the minimap correctly but it is also showing up in the player’s normal in game view which we definitely do not want. It should only be visible from the minimap camera and never from the regular gameplay camera.
To fix this select your Player Indicator Sprite component and scroll down to its Rendering settings. Open the Advanced section and enable Owner No See. This tells the normal player controlled camera to ignore this sprite completely while still allowing the separate orthographic minimap camera to see and capture it perfectly fine.
You might also notice the arrow appears to clip slightly into the character model because of how orthographic cameras handle depth differently compared to normal perspective cameras. If this happens try switching the sprite’s material to a Masked material type instead of the default one. This often fixes the depth ordering issue and makes the arrow render cleanly on top without clipping.
Final Thoughts
At this point you have a fully working minimap. A flat top down view that stays fixed in place a player indicator arrow that shows exactly where you are and which direction you are facing and a clean UI widget displaying all of it neatly in the corner of the screen. From here you can easily customize things further such as adding a circular mask to make the minimap round instead of square or adding a decorative border image around it to make it feel more polished and finished.
The core idea behind this whole system is quite simple once you break it down. A special camera captures a top down view and saves it as an image. That image gets turned into a material. The material gets displayed inside a widget on the player’s screen. Everything else in this tutorial is just small adjustments to make that basic idea look clean smooth and actually useful during real gameplay.

Solo Indie Game Developer and Unreal Engine (UE4 & UE5) Specialist with over 5 years of experience building optimized Android games from scratch.
I specialize in handling the full development pipeline independently taking mobile titles from concept to high-performance, publishing ready APK/AAB builds. Highly focused on rendering optimization for low-to-mid range devices, Blueprint scripting, and custom mechanics.
Through this blog, I share my practical knowledge and tutorials to help aspiring developers master the Unreal Engine mobile ecosystem.