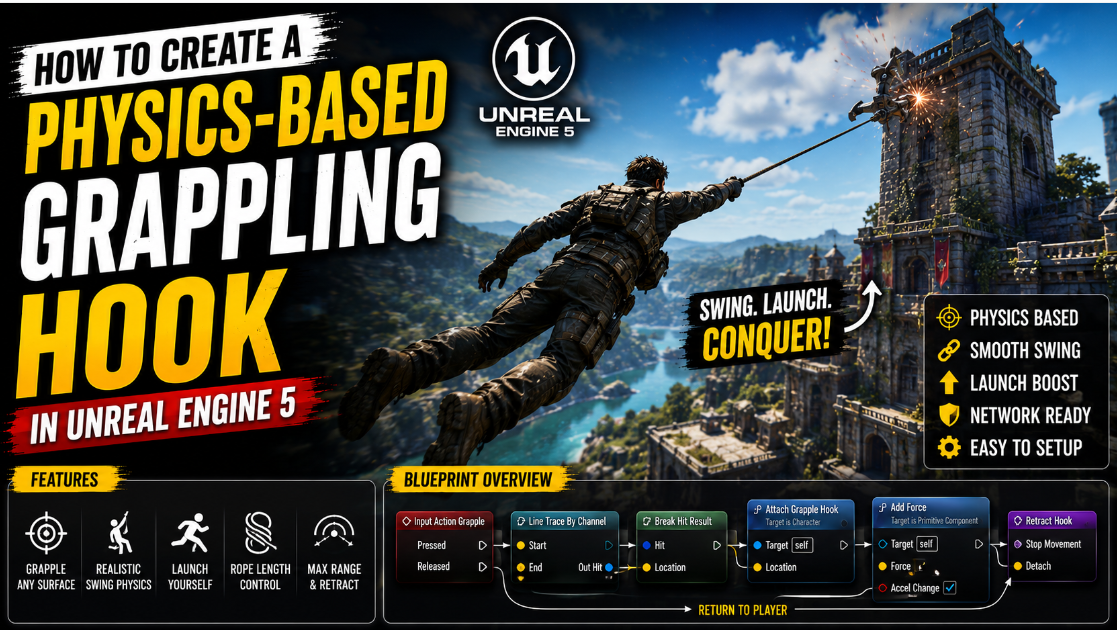
How to Create a Physics-Based Grappling Hook in UE5
Swinging through the air by shooting a hook at a distant wall and getting pulled toward it is one of the most fun traversal mechanics you can add to a game. It instantly makes movement feel more dynamic and exciting. In this article I will walk you through building a complete grappling hook system in UE5 using a line trace to detect where you are aiming a cable component to visually show the hook line and physics forces to actually pull the character toward the grab point.
Step 1: Detect Where the Player Is Aiming
Open your character Blueprint. This example uses a First Person Character but the same logic works fine on a Third Person character too.
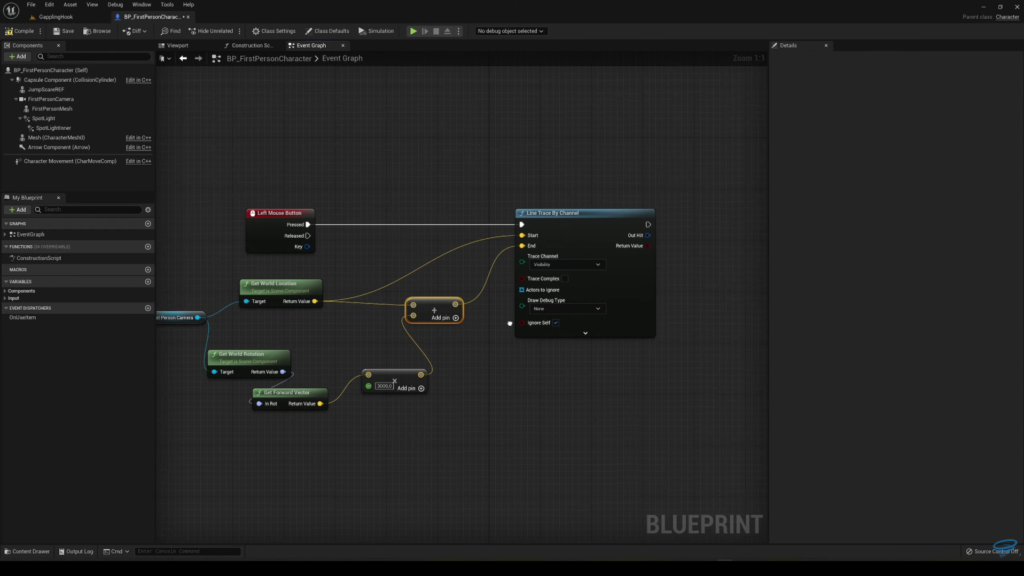
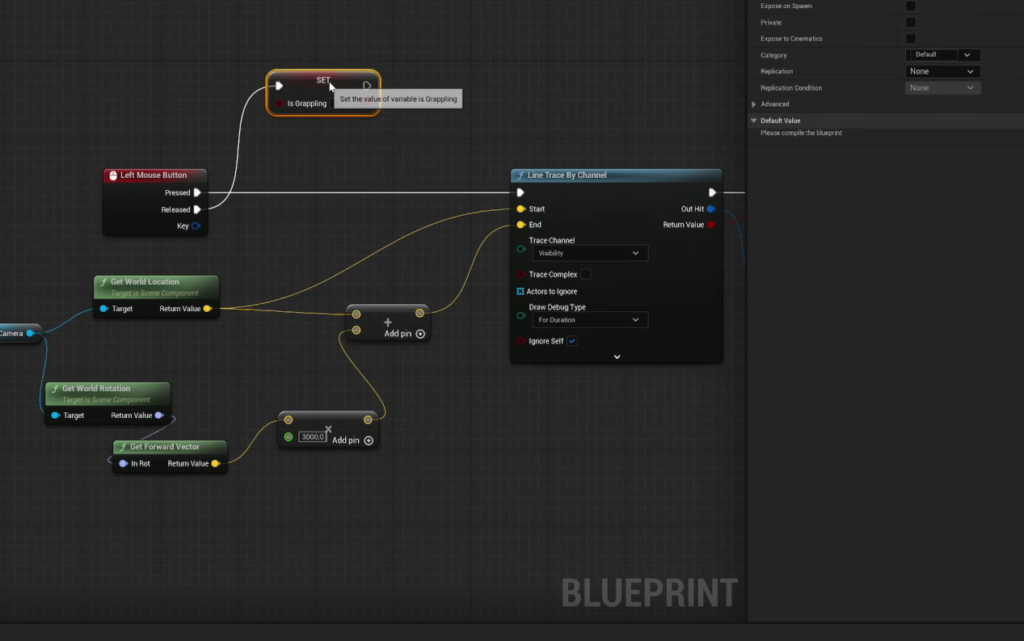
We want the grappling to start when the player left clicks. Bind the Left Mouse Button input and on the Pressed event add a Line Trace By Channel node. This trace is what figures out exactly where in the world the player is aiming, so we know where the grappling hook should actually attach.
For the Start of this trace get your camera, whichever one your character uses, and pull its World Location. For the End point we need a point far ahead in the direction the camera is facing. Get the camera’s World Rotation and pull its Forward Vector from that. Multiply this vector by however far you want the grappling hook to reach, converting this multiplier into a Float first so you can easily adjust the number. A value like 3000 works well as a generous grappling range, though you can tune this to whatever feels right for your game.
Add this multiplied forward vector to your starting location to calculate the actual End point for the trace.
Step 2: Store the Point You Hit
From your Line Trace node take the Return Value and connect it into a Branch, since we only want to continue if the trace actually hit something.
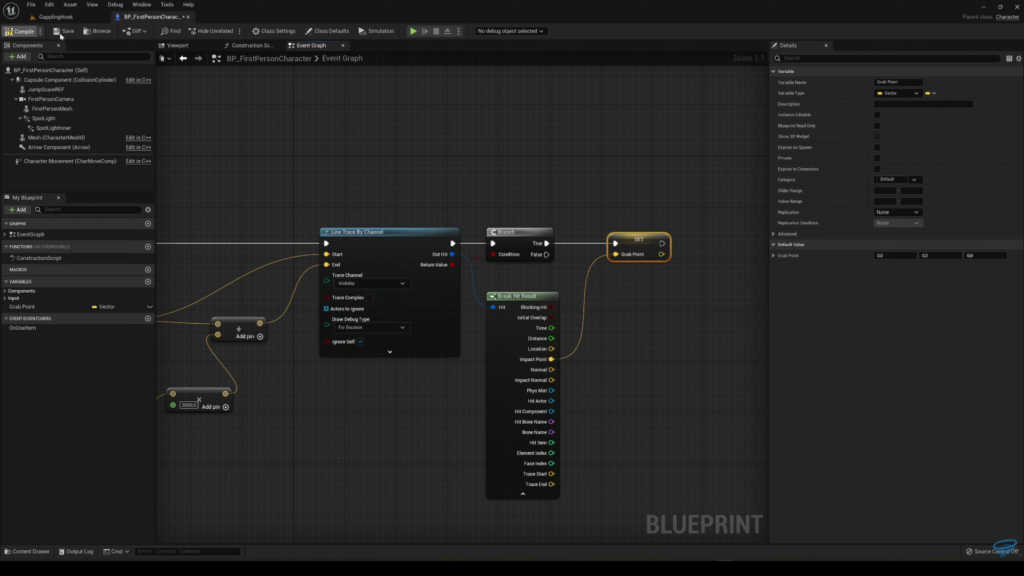
If it hit something break the Hit Result and get the Impact Point. Right click this and promote it to a variable, naming it something like Grab Point. This variable will store exactly where in the world the player successfully aimed and hit something they can grapple to.
To test this is working correctly you can temporarily add a Draw Debug Line node with a duration of a couple seconds right after your trace. Press play and left click while aiming at different walls or objects. You should see a visible line appear showing exactly where your trace is going and confirming it correctly detects a valid point to grapple toward.
Step 3: Create the Grappling State
Add a new Boolean variable called something like Is Grappling. On your Left Mouse Button Pressed event, right after successfully getting a valid Grab Point, set this variable to true.
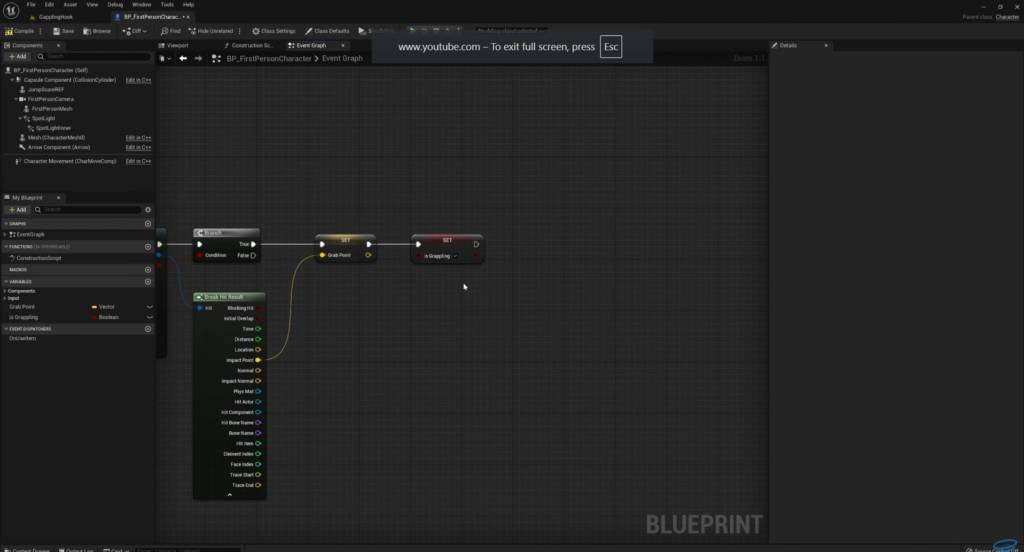
On the Released event for the same input, meaning when the player lets go of the left mouse button, set Is Grappling back to false. This makes sense since letting go of the button should stop the grappling effect entirely.
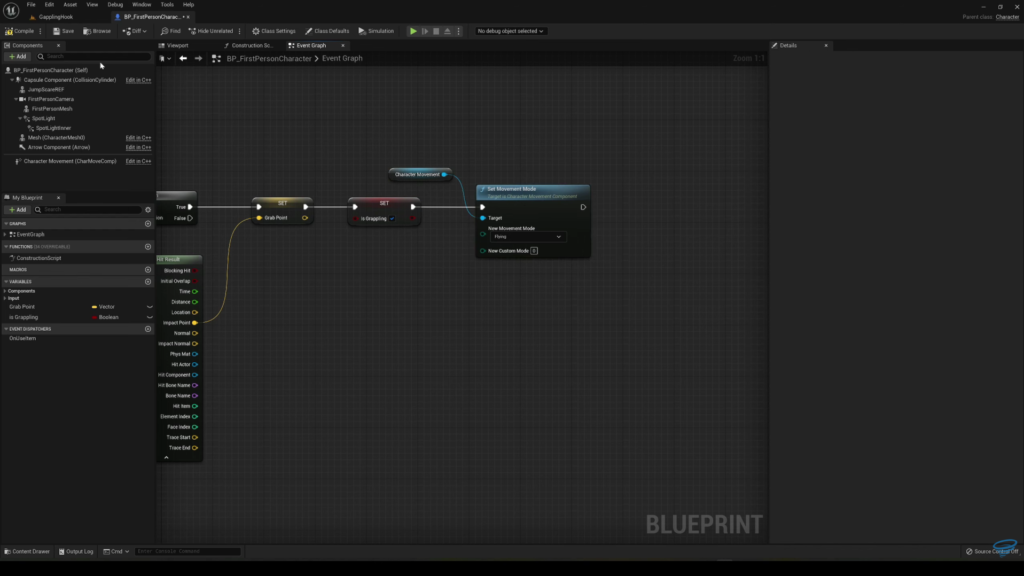
We also want the character’s movement to feel different while grappling, more like floating through the air rather than normal walking. On the Pressed event get your Character Movement Component and use Set Movement Mode, changing it to Flying. This gives the character a floaty airborne feeling while being pulled toward the grab point.
On the Released event copy this same Set Movement Mode logic but change it back to Falling instead of Walking. This is important because the player will likely still be up in the air when they release the grapple, and setting movement mode straight back to Walking would cause issues since the character is not actually touching the ground yet.
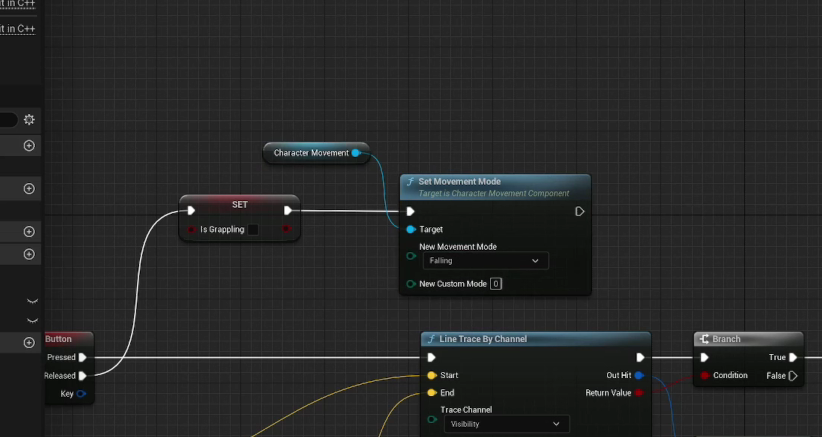
Falling correctly handles this and the character will automatically switch back to Walking on its own the moment they actually land.
Step 4: Add a Visual Cable
A grappling hook without any visible rope or cable connecting the player to their target looks incomplete. Let us add a Cable Component to fix this.
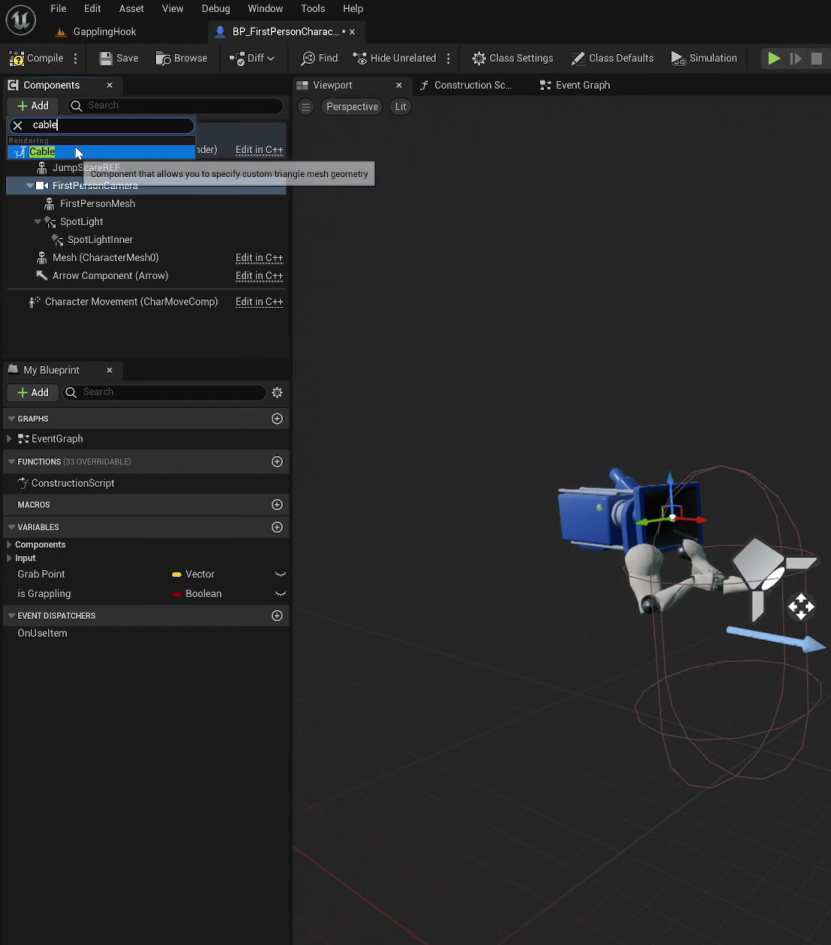
Go to your character’s Viewport tab and select whichever component you want the cable to visually start from, such as your camera or a weapon mesh if you have one. Search for Cable and add this component.
Position this cable roughly where a grappling gun or hand would logically be holding it from. Set its Number Of Segments to 1 so the cable renders as a straight tight line rather than a loose sagging rope, since a grappling cable under tension should look taut rather than baggy.
By default we want this cable hidden until the player is actually grappling. Find its Visibility setting and turn it off in the component defaults.
Step 5: Show and Hide the Cable at the Right Moments
Go to your Event Graph. Right after your Set Movement Mode logic on the Pressed event, get your Cable component and use Set Visibility, setting it to true so the cable becomes visible the moment grappling starts.
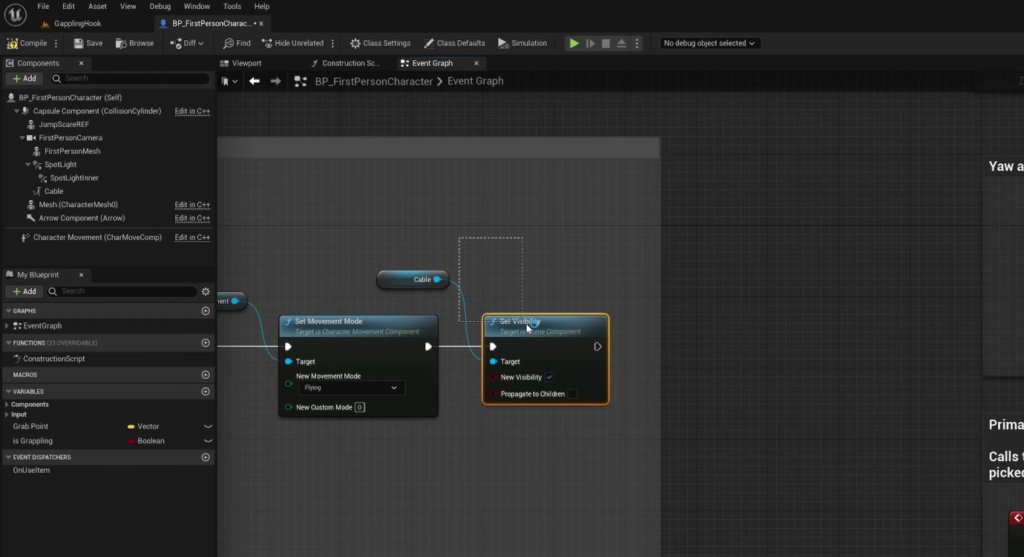
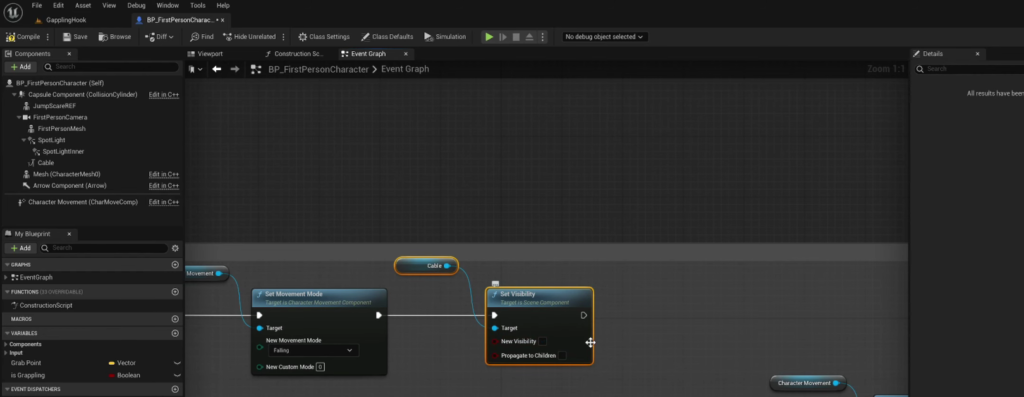
Copy this same node over to your Released event but set it to false instead, hiding the cable again once the player lets go and stops grappling.
Step 6: Connect the Cable to the Grab Point
Now we need the cable to actually visually stretch from the player toward wherever they grabbed. Get your Cable component and use Set End Location.
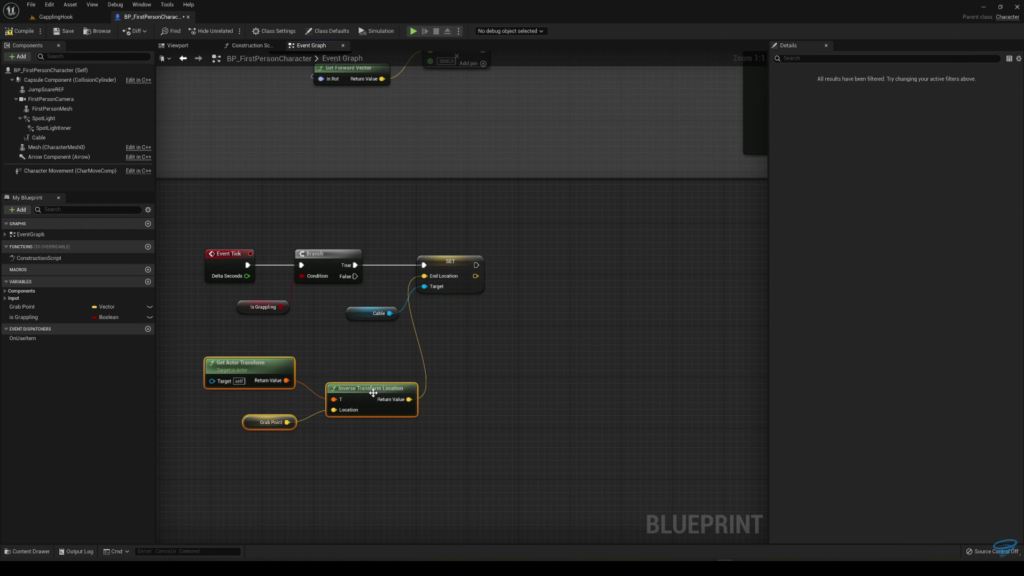
You might think to simply plug your Grab Point variable directly into this End Location input, but doing this causes visual glitches since the cable’s end location needs to be calculated relative to the cable’s own current position and rotation rather than as a raw world position. Instead get your Grab Point variable and run it through an Inverse Transform Location node, using Get Actor Transform as the reference transform for this calculation. Plug this properly converted result into the End Location input instead.
Test this now. Press play, aim at a wall and hold left click. You should see the cable stretch out visibly from your character toward the exact point you grappled onto, staying properly connected even as you move around.
Step 7: Calculate the Direction to Pull Toward
Visually the cable now looks correct but nothing is actually happening physically yet. The character is not being pulled anywhere. Let us fix that using an Event Tick, since we want this pulling force applied continuously every single frame while the player is actively grappling.
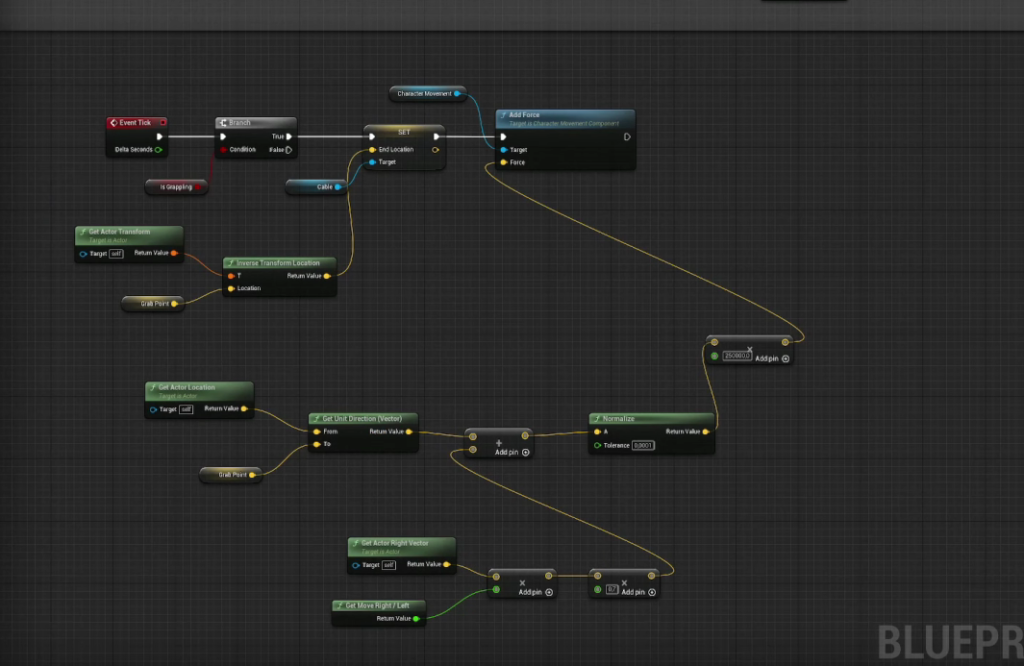
On Event Tick add a Branch checking your Is Grappling boolean, since we only want any of this logic to run while the player is actually holding the grapple.
If true we need to figure out the direction from the character toward the Grab Point. Get your Grab Point variable and use Get Unit Direction, plugging in your character’s current Actor Location as the second input. This gives us a normalized direction vector pointing exactly from where the character currently is toward the point they grappled onto.
Step 8: Add Some Side to Side Stability
A grappling hook that pulls in a perfectly straight line can sometimes feel stiff or cause the character to spin unpredictably. To smooth this out we are going to blend in a small amount of the character’s own right vector as well.
Get your character’s Actor Right Vector and multiply this by a small float value, something like 0.7 works well as a gentle influence rather than a dominant force. Add this result together with your direction vector from the previous step.
After adding these together run the combined result through a Normalize node, which ensures we still end up with a clean direction vector of consistent length regardless of how these two values combined.
Step 9: Apply the Actual Pulling Force
Take this final normalized direction and multiply it by a large float value representing how strong the pull toward the grab point should feel. Something like 250000 works as a strong noticeable pull, though this number depends heavily on your character’s scale and mass so you will likely need to experiment here to find what feels right for your specific game.
Plug this final calculated force into an Add Force node, called on your Character Movement Component. This is what actually physically propels the character through the air toward wherever they grappled, creating that satisfying swinging and pulling sensation.
Step 10: Test the Complete System
Press play and aim at a solid object like a column or wall. Left click and hold. You should see the invisible line trace successfully detect a valid point, the cable become visible and stretch toward that exact location, and your character begin flying through the air pulled directly toward it with a satisfying momentum behind the movement.
Release the mouse button and confirm the cable disappears, your character switches into Falling movement mode instead of getting stuck floating, and everything transitions smoothly back to normal movement once you land on the ground again.
Fine Tuning Your Grappling Hook
The exact numbers used throughout this system, the trace range the force multiplier and the small side vector influence, are all things worth experimenting with based on how your specific game feels. A larger force value creates a faster more aggressive pull while a smaller one feels slower and more controlled. Increasing the small right vector influence from Step 8 adds a bit more natural swinging arc to the movement rather than pulling in a completely straight rigid line.
You could also expand this system further by adding a maximum grapple range check so the player cannot grapple to points too far away, adding a cooldown so the hook cannot be fired instantly again after releasing, or swapping the flying movement mode for a more physics based approach using launch character impulses instead for an even more dynamic feeling swing.
Final Thoughts
This grappling hook system combines three separate pieces working together smoothly. A line trace to detect exactly where the player is aiming, a cable component to visually represent the connection, and a continuously applied force to actually pull the character through the air toward that point. Once you understand how these three pieces connect together you have a solid foundation that can be adjusted and expanded in many directions depending on exactly how you want grappling to feel in your own game.

Solo Indie Game Developer and Unreal Engine (UE4 & UE5) Specialist with over 5 years of experience building optimized Android games from scratch.
I specialize in handling the full development pipeline independently taking mobile titles from concept to high-performance, publishing ready APK/AAB builds. Highly focused on rendering optimization for low-to-mid range devices, Blueprint scripting, and custom mechanics.
Through this blog, I share my practical knowledge and tutorials to help aspiring developers master the Unreal Engine mobile ecosystem.