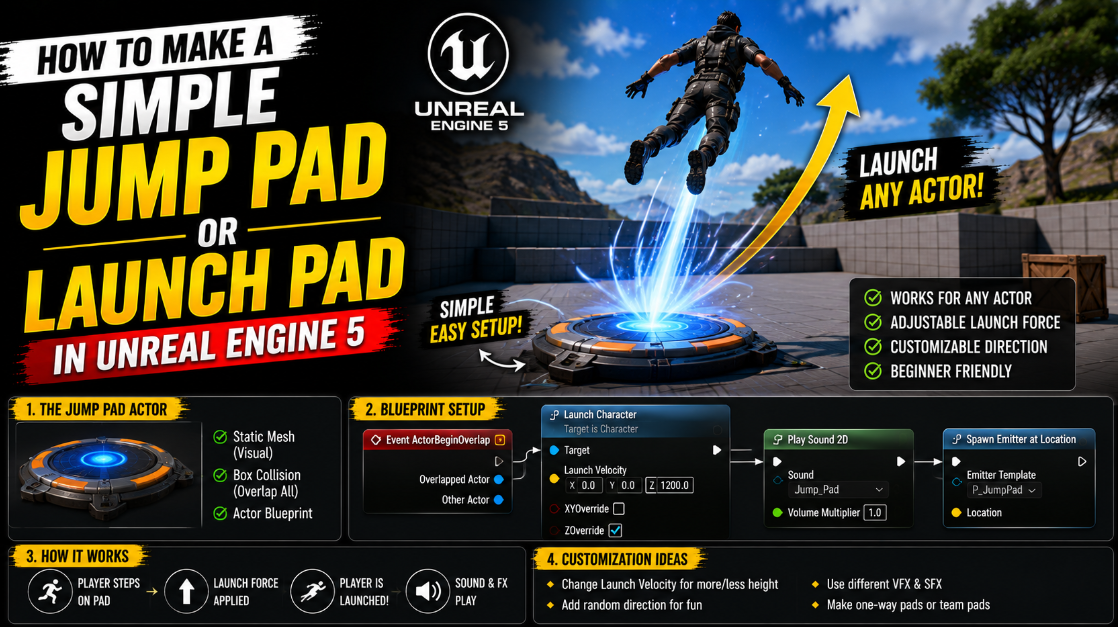
How To Make a Simple Jump Pad or Launch Pad in Unreal Engine 5
A jump pad is exactly what it sounds like. Your character steps onto it and gets launched high into the air instead of just walking over it. Games use this all the time for fun traversal moments or to reach otherwise unreachable platforms. In this article I will walk you through building a complete jump pad in UE5 including a nice bounce animation that plays every time your character lands on it.
Step 1: Create the Jump Pad Blueprint
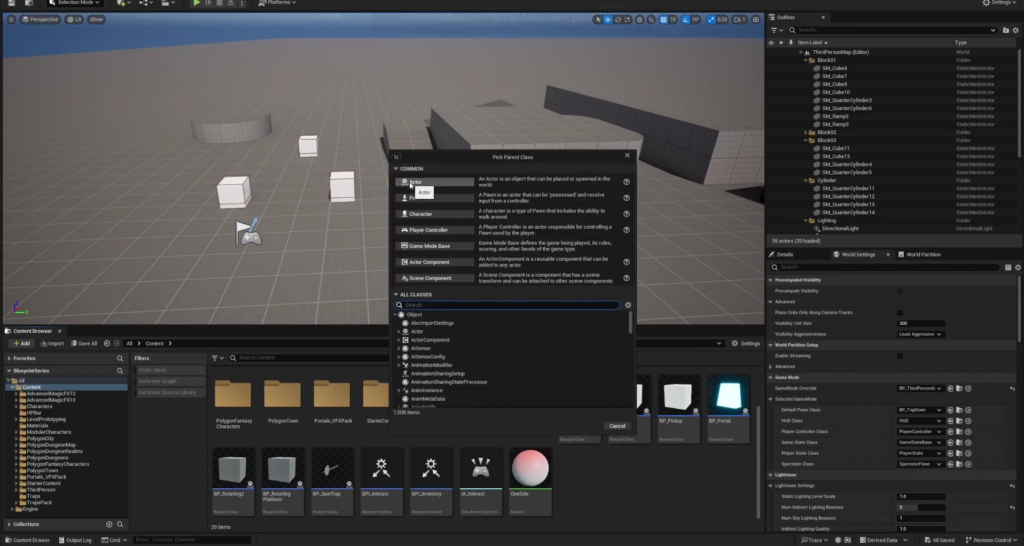
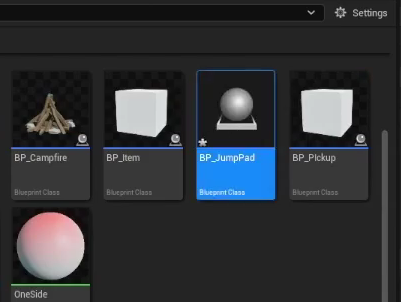
Go to your Content Browser right click and create a new Blueprint Class. Choose Actor as the parent type and name it something like BP Jump Pad. Open this up in the Blueprint editor.
The first thing we need is a visual mesh for the pad itself. Add a Static Mesh component and name it something like Jump Pad. Set its mesh to a simple Cube for now since we can swap this for something nicer looking later.
With this Jump Pad mesh selected click Add and add a Box Collision component. Leave its name as the default Box. This collision box is what will actually detect when the player steps onto the pad.
Step 2: Detect When the Player Steps On It
Go to the Event Graph. Select your Box collision component scroll down to its Events section and click the plus icon next to On Component Begin Overlap. This adds the event that fires the moment anything overlaps with this box.
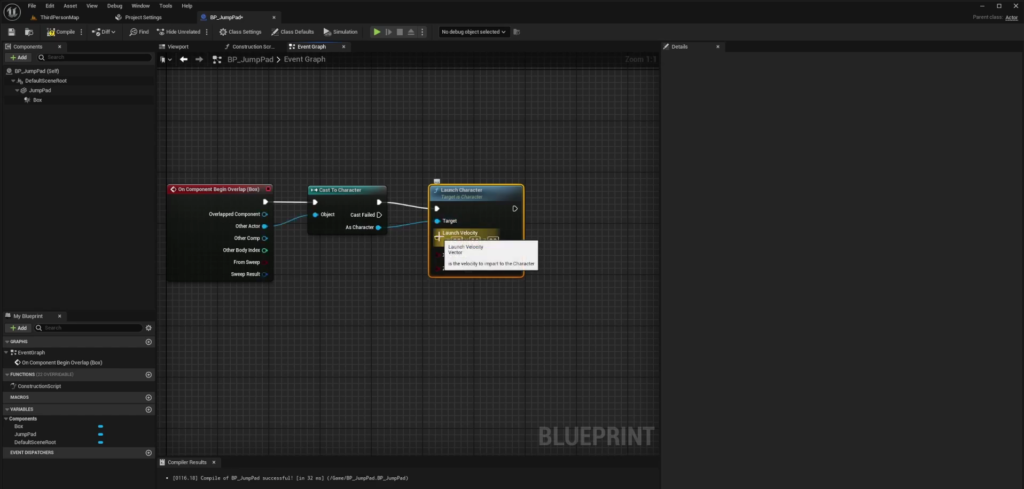
From this event we only want to react when the player character specifically steps onto it rather than any random object. Add a Cast To node targeting your character Blueprint. Connect the Other Actor pin from the overlap event into this cast node’s Object input.
Step 3: Launch the Character Into the Air
Unreal Engine already has a built in function specifically for this kind of effect called Launch Character. Drag out from the successful cast output and search for this node. Connect the As Character output from your cast into the Target input of Launch Character.
This node needs a Velocity input telling it exactly how to launch whatever character touches it. Go to your Variables panel and create a new variable called something like Velocity with its type set to Vector. Since this variable currently has no default value set one now. For a jump pad that launches the player straight upward set the Z value to something like 1000 while leaving X and Y at zero.
Connect this Velocity variable into the Launch Velocity input of your Launch Character node. Also make sure the XY Override and Z Override checkboxes on this node are both checked, since these tell the engine to fully replace the character’s current velocity in those directions rather than simply adding to whatever momentum they already had.
Step 4: Add a Bounce Animation
A jump pad that launches the player but never visually reacts itself feels lifeless. Let us add a small squash and stretch style bounce so the pad itself visibly reacts every time it gets triggered.
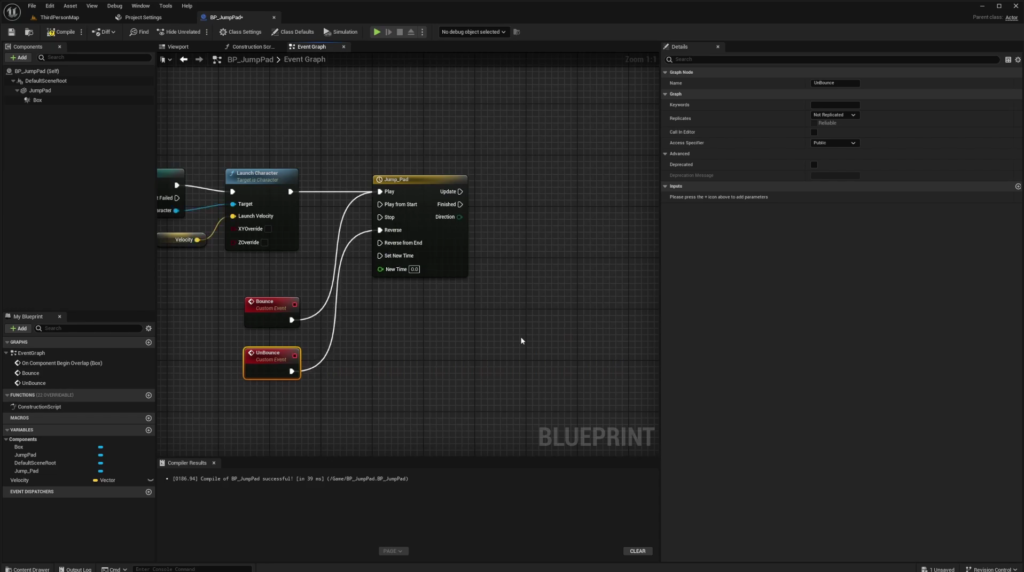
Add a Timeline node and name it something like Jump Pad. Create two Custom Events as well. Name the first one Bounce and the second one Unbounce.
Connect your Bounce custom event to the Play input of the Timeline, and connect your Unbounce custom event to the Reverse input. This setup means calling Bounce plays the timeline forward while calling Unbounce plays it backward, which is exactly what we want for a smooth expand and return effect.
Step 5: Configure the Timeline Curve
Double click your Timeline node to open its editor. Set its overall Length to something like 0.5 seconds. Click Add Track and choose a Float Track.
Add two keyframes on this track. The first at time 0 with a value of 0. The second at time 0.5 with a value of 1. After placing both keyframes select them and hit F on your keyboard to properly frame and stretch the view so you can see them clearly.
Right click on both of these keyframes and set their interpolation to Auto. This gives the curve a smooth natural curve instead of a straight rigid line, which makes the bounce feel more fluid and less mechanical.
Step 6: Connect the Timeline to Actual Scaling
Back in your Event Graph drag out from the Timeline’s Update output and add a Set Actor Relative Scale 3D node.
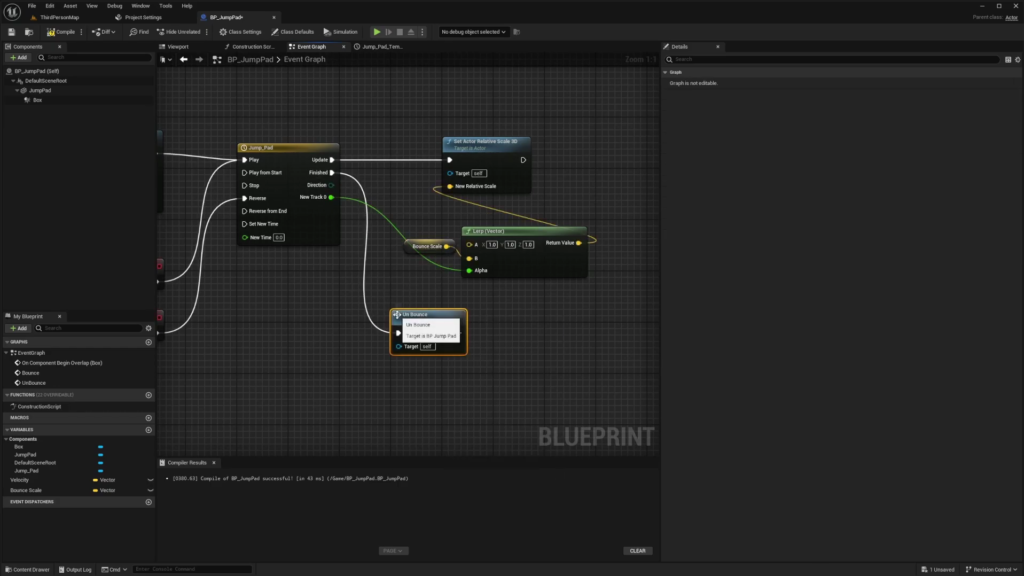
For the New Relative Scale input we want to blend between the pad’s normal size and a slightly larger bounced size. Drag out from this input and search for Lerp Vector. For the A input use a value of 1, 1, 1 representing the pad’s completely normal unscaled size.
For the B input right click and promote it to a new variable, naming it something like Bounce Scale. This vector determines exactly how large the pad grows to during its bounce. Set this to something like 1.2 on all three axes so the pad noticeably expands outward in every direction when triggered.
Connect your Timeline’s float output value into the Alpha input of this Lerp Vector node. This means as the timeline plays from 0 to 1 the pad smoothly scales from its normal size up to its slightly enlarged bounce size.
Step 7: Trigger the Bounce and Return It to Normal
Go to where your Timeline’s Finished output fires, meaning the moment the forward Bounce animation completes. Connect this to call your Unbounce custom event. Since Unbounce is wired to the Timeline’s Reverse input from Step 4 this automatically plays the whole scaling animation backward, smoothly shrinking the pad back down to its original normal size right after it finished bouncing outward.
Compile and save your Blueprint once everything is connected correctly.
Step 8: Place and Test the Jump Pad
Go back to your level and drag your BP Jump Pad into the scene. You will likely notice the default cube is quite large so reduce its scale down to something more reasonable for your level.
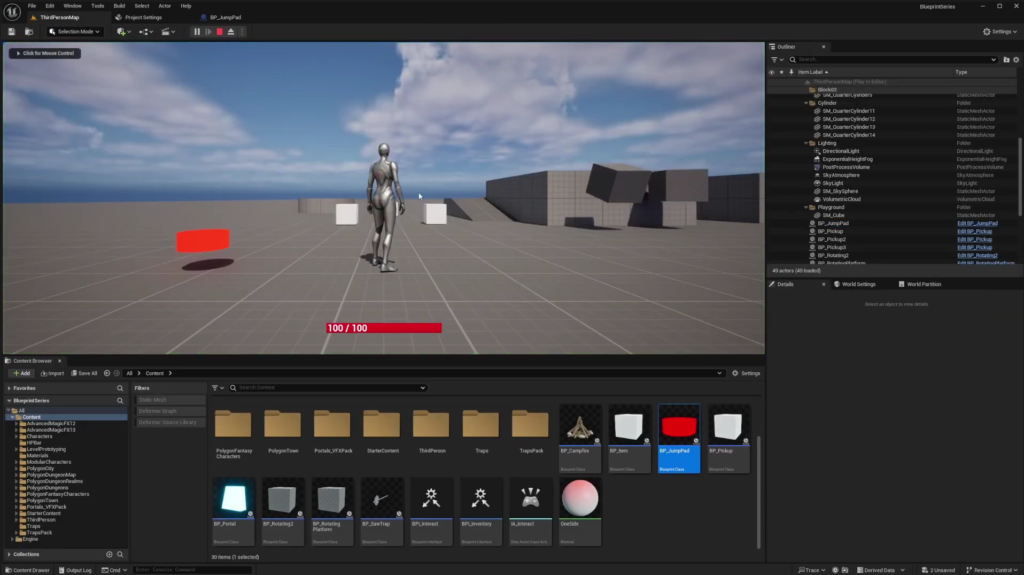
Spawn your character somewhere nearby so you can easily walk onto the pad and test it.
For a nicer look you can swap the plain cube mesh for something like a Cylinder instead, which tends to read more clearly as an actual jump pad shape. If you do this make sure your Box Collision component is repositioned and resized to properly line up with your new mesh shape so the overlap detection still works correctly.
Giving your jump pad a distinct material also helps a lot visually, since players should be able to immediately recognize it as something interactive rather than just another piece of level geometry. Something bright and noticeable like a red material works well here.
Step 9: Confirm Everything Works Together
Press play and walk your character onto the jump pad. You should see two things happening at exactly the same time. Your character gets launched upward into the air thanks to the Launch Character logic from Step 3, and the pad itself visibly bounces outward and back thanks to the Timeline and scaling logic from Steps 4 through 7.
You can press F8 while in play mode to detach from your character’s camera and get a free floating view of the level, which makes it much easier to actually watch the pad’s bounce animation play out clearly rather than only seeing your character fly upward from a first or third person perspective.
Why This Combination Works So Well
The real trick behind a satisfying jump pad is combining two separate but simultaneous pieces of feedback. The actual gameplay effect, meaning the character genuinely being launched into the air through Launch Character, and the visual feedback from the pad itself reacting physically through the scale animation. Either one on its own would feel incomplete. A launch with no visual reaction from the pad feels disconnected from what triggered it, while a bouncing pad with no actual launch effect would just look like a strange decoration.
Having both fire from the exact same overlap event, using a Cast To make sure only the player actually triggers it, keeps this whole system contained in one clean reusable Blueprint. You can place as many of these jump pads around your level as you want and each one will behave identically and correctly without needing any additional setup beyond simply placing it in the world.
Final Thoughts
This jump pad system is a great example of how a small amount of Blueprint logic can create something that feels genuinely satisfying to interact with in game. The Launch Character node handles all the actual physics of sending your character flying, while a simple Timeline driven scale animation gives the pad itself a lively bounce that reinforces exactly what just happened.
From here you could expand this further by adding a sound effect that plays alongside the bounce animation, adjusting the Velocity variable to create pads with different launch heights and strengths throughout your level, or even adding a directional launch instead of a straight vertical one to send players flying at an angle toward a specific target location.

Solo Indie Game Developer and Unreal Engine (UE4 & UE5) Specialist with over 5 years of experience building optimized Android games from scratch.
I specialize in handling the full development pipeline independently taking mobile titles from concept to high-performance, publishing ready APK/AAB builds. Highly focused on rendering optimization for low-to-mid range devices, Blueprint scripting, and custom mechanics.
Through this blog, I share my practical knowledge and tutorials to help aspiring developers master the Unreal Engine mobile ecosystem.