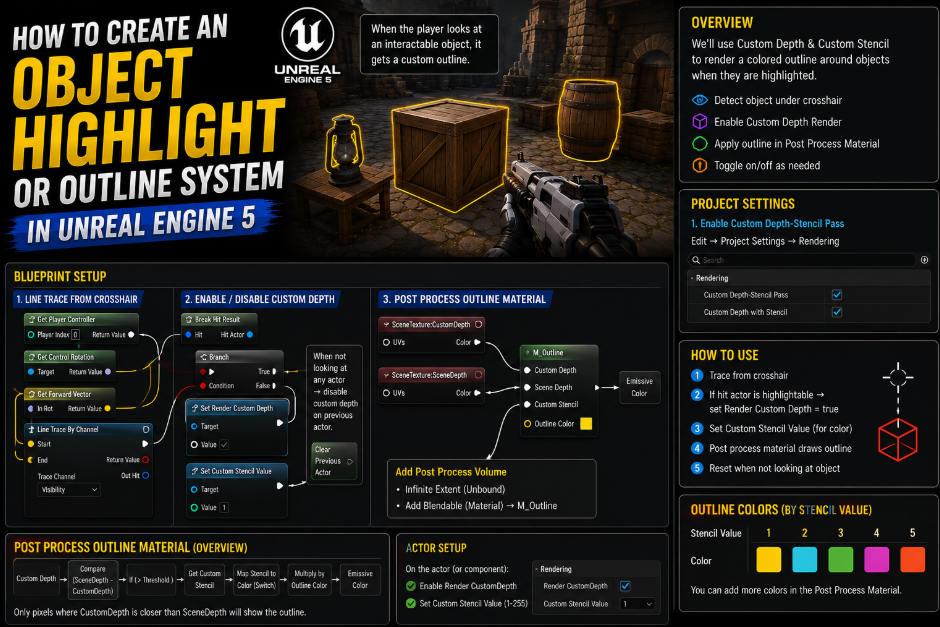
How to Create an Object Highlight or Outline System in UE5
Highlighting an object with a colored outline when the player walks near it is a small detail that makes interaction systems feel much more polished. The player instantly knows what they can pick up or interact with just by looking at the glowing edge around it. In this article I will show you how to build this entire outline effect from scratch including making it appear only when the player is close enough and disappear again once they walk away.
Step 1: Create a New Material for the Outline
Start by creating a new folder in your Content Browser and name it something like M_Materials. Inside this folder right click and create a new Material. Name it Outline Material and open it up.
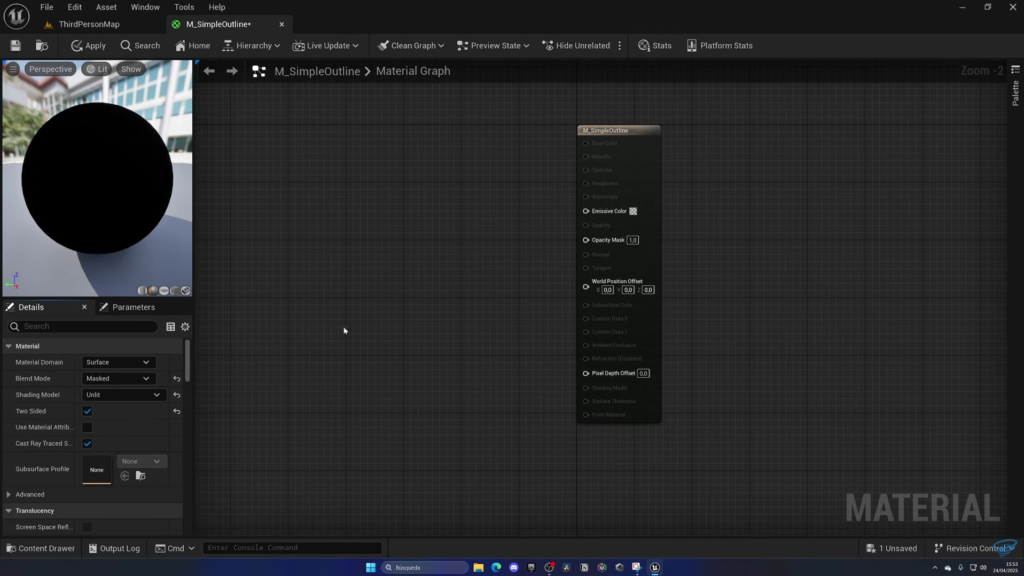
Go to the Details panel of this material and change two important settings. Set the Blend Mode to Masked and set the Shading Model to Unlit. Also make sure the Two Sided option is checked. These settings are what make the outline trick work properly since we are going to be rendering a slightly larger inverted version of the object’s own mesh to create the outline effect.
Step 2: Set Up the Mask for the Front Face
Right click in the material graph and search for Two Sided Sign. Drag out from this node and search for One Minus, then connect the result into the Opacity Mask input.
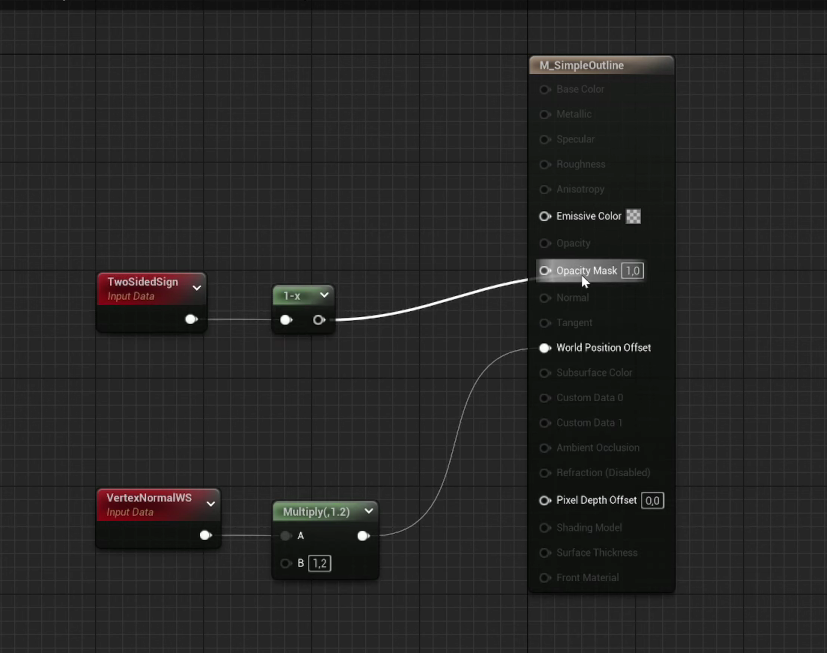
This step makes sure the normally visible front facing side of the mesh gets masked out completely, leaving only the back facing inverted side visible, which is exactly the part we want to use for our outline.
Step 3: Control the Thickness of the Outline
Right click again and search for Vertex Normal World Space. Drag out from this and connect it into a Multiply node.
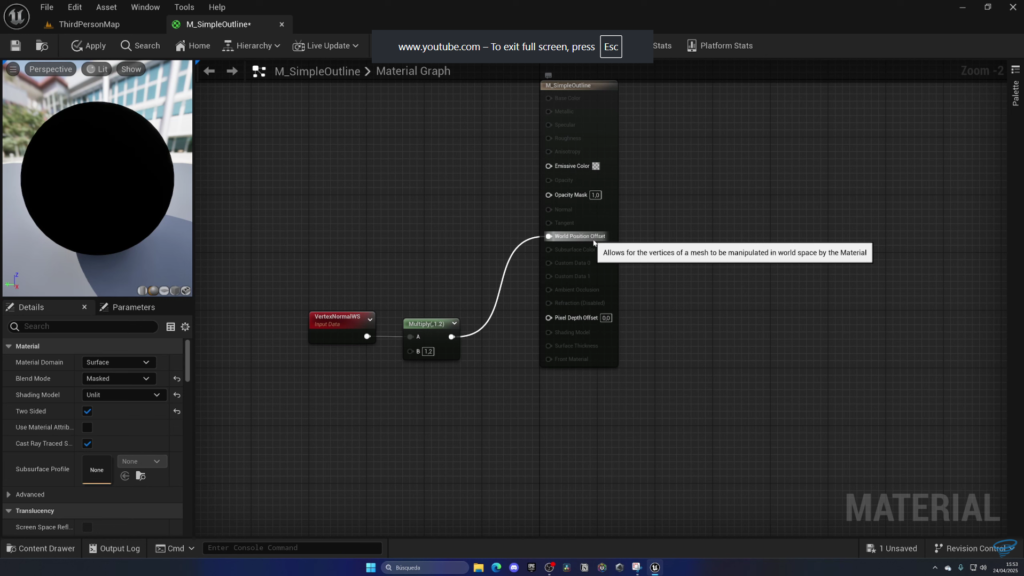
Now right click once more and add a Scalar Parameter. Name this parameter Line Thickness and give it a default value such as 1. Plug this parameter into the other input of your Multiply node. Take the result of this multiplication and connect it into the World Position Offset input of the material.
What this does is push the mesh’s surface outward slightly along its own normals, based on however large the Line Thickness value is. Since we are only seeing the inverted back facing geometry thanks to our masking setup from the previous step, this slight outward push is what creates the visible outline effect around the edges of the object.
Step 4: Set the Outline Color
To control the actual color of this outline right click in the graph and add a Constant 3 Vector node. Right click on this node and convert it to a Parameter, naming it something like Color.
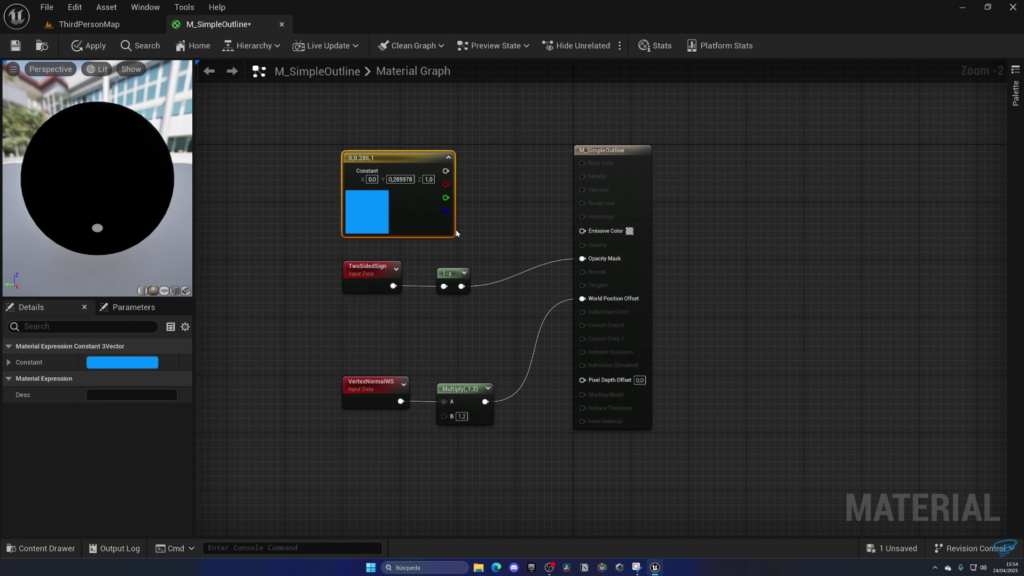
Set this to whichever color you want your outline to start with, red works well as an example. Connect this into the Emissive Color input of the material.
Apply and save your material once everything is connected. You now have a fully functional outline material ready to test.
Step 5: Test the Outline on an Object
Select any object in your level, for example a simple cube. In its Details panel search for Overlay and you should find a setting called Overlay Material.
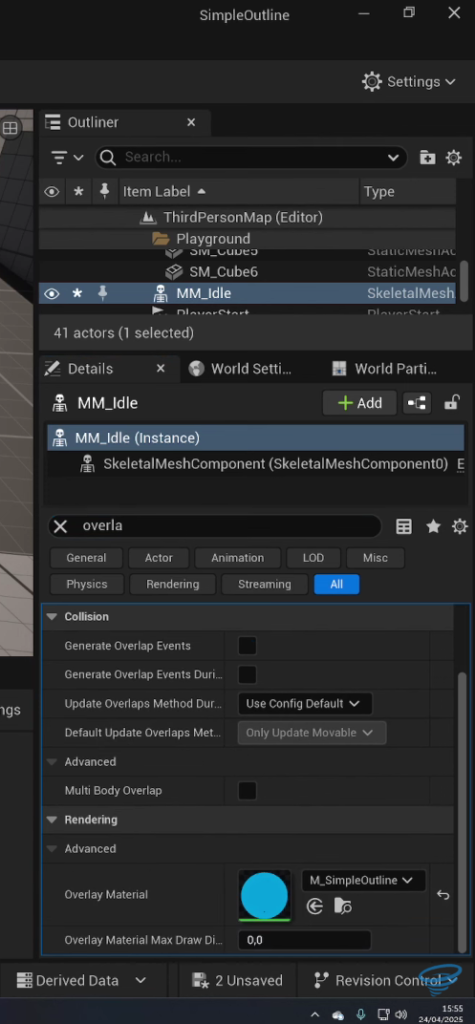
Drag your newly created Outline Material into this slot. Your selected object should now display a visible outline around its edges using the color and thickness you set up earlier.
Step 6: Create Material Instances for Different Colors
Rather than creating a completely separate material every time you want a different outline color or thickness, you can create Material Instances instead, which let you quickly adjust these parameters without touching the original material’s node setup at all.
Right click on your Outline Material and select Create Material Instance. Name it something like Outline Material Instance. Drag this instance onto your cube in place of the original material.
Inside this instance you will see two checkboxes corresponding to the parameters we created earlier, Line Thickness and Color. Expand both of these sections and make sure their checkboxes are enabled so you can actually override their values here. Try changing the color to something like green and increasing the thickness value to something like 10 to see a noticeably thicker outline. This makes it very easy to create several different outline styles for different types of objects across your game just by making more instances and adjusting these two values differently for each one.
Step 7: Build a Blueprint to Trigger the Outline Automatically
Having to manually assign the overlay material to every object is not practical for an actual game. We want the outline to appear automatically whenever the player walks near an object and disappear automatically when they walk away.
Create a new Blueprint for whatever object you want this behavior on. In this example we are using a simple Cube Blueprint. Add your cube’s Static Mesh component as usual, then add a Sphere Collision component to act as the detection radius around this object.
By default this Sphere Collision component starts with a fairly small radius, around 32 units, which might be too small to detect the player from a reasonable distance. Adjust this radius to whatever size feels right for your game, expanding it out so the player can trigger the outline from a comfortable distance away.
Make sure this Sphere Collision component has Generate Overlap Events enabled in its collision settings, since without this the overlap events we are about to use will never actually fire.
Step 8: Wire Up the Overlap Events
Go to the Event Graph of this Blueprint. Find the Event Actor Begin Overlap node, which fires whenever something enters this sphere’s collision radius. From this event get a reference to your Static Mesh component and drag out from it to find the Set Overlay Material node. Set this to one of your outline material instances, such as the green or red version you created earlier.
Now find the Event Actor End Overlap node, which fires the moment something leaves the collision radius. From this event call Set Overlay Material again on the same Static Mesh component, but this time leave the material input empty or set it to None. This effectively removes the outline the moment the player walks away from the object.
Step 9: Test the Complete System
Press play and walk your character toward the object with this Blueprint set up. As soon as you enter the sphere’s collision radius the outline should appear instantly around the object. Walk away and the outline should disappear just as smoothly. If everything is wired up correctly this creates exactly the kind of proximity based highlight effect that most interaction systems use to let players know what they can currently interact with.
Why This Approach Works So Well
The real strength of this system is how reusable it becomes once the core material is built correctly. You never need to touch the original Outline Material’s actual node graph again for most changes. Every new object type in your game that needs a highlight can simply get its own Material Instance with whatever color and thickness values make sense for that specific object, whether that is a bright yellow outline for a key item or a subtle white outline for something less important.
The Blueprint logic controlling when the outline appears and disappears is also incredibly simple, just two events and two nodes each. This means adding this exact same highlight behavior to a dozen different interactable objects in your game is mostly a matter of copying this same small setup and adjusting the collision radius or material instance for each specific case, rather than writing new logic from scratch every time.
Final Thoughts
An outline highlight system like this is one of those small visual touches that makes a huge difference in how polished an interaction system feels to play. Instead of players guessing what they can interact with, a clean glowing edge tells them immediately and clearly. Combined with an interaction system covered in an earlier article using Blueprint Interfaces, you now have both the visual feedback and the underlying functional logic needed to build a genuinely satisfying interaction experience for players moving through your game world.

Solo Indie Game Developer and Unreal Engine (UE4 & UE5) Specialist with over 5 years of experience building optimized Android games from scratch.
I specialize in handling the full development pipeline independently taking mobile titles from concept to high-performance, publishing ready APK/AAB builds. Highly focused on rendering optimization for low-to-mid range devices, Blueprint scripting, and custom mechanics.
Through this blog, I share my practical knowledge and tutorials to help aspiring developers master the Unreal Engine mobile ecosystem.